At Folio3, we empower eCommerce brands to realize scalable, future-proof shopping experiences with our Shopify headless eCommerce solutions. Our solutions enable:

Headless setups split content, products, and checkout across systems. Managing disconnected services increases complexity, slows updates, and raises the risk of errors during storefront changes.

Traditional headless builds rely on heavy custom development. Complex integrations and overengineering inflate timelines and costs beyond initial estimates.

Multiple API dependencies slow performance and introduce data gaps. API failures can disrupt product data, pricing, or checkout, directly impacting customer trust and sales.

Want to design, develop, or scale your B2B, B2C, or D2C store on Shopify? Our Shopify development agency delivers the right solutions to help your business grow.
Drive B2B growth with custom Shopify Plus solutions that scale enterprise stores seamlessly.
Reliable Shopify maintenance that ensures uptime, fast performance, and sustainable growth.
Optimize Shopify speed to boost conversions, improve rankings, and retain more customers.
Deliver lightning-fast, custom storefronts with scalable Shopify headless commerce solutions.
Build conversion-driven Shopify themes tailored to your brand, customers, and growth goals.
Revamp existing Shopify themes for better branding, UX, speed, and higher conversions.
Extend Shopify’s capabilities with custom apps designed for B2B and enterprise growth.
Create stunning, user-friendly Shopify designs that reflect your brand and drive sales.
Seamlessly migrate from Magento, WooCommerce, or BigCommerce to Shopify without downtime.
Connect Shopify with ERPs, CRMs, and tools to automate and scale operations.
Hire certified Shopify experts as your extended team for scalable B2B growth.
Let us help you build your Headless Shopify store. Request a free consultation and quote from our certified Shopify experts today.
Explore our portfolio of Shopify solutions that’ve helped many eCommerce brands boost conversion and engagement rates.


Go omnichannel with headless Shopify. Deliver your brand experience across web platforms, progressive web apps, mobile apps, and beyond.
Build a flexible storefront to provide tailored customer journeys based on preferences and behavior. Create unique shopping experiences across channels.
Headless is API-driven and built using reusable components. Easily manage growing traffic, enable innovation, and expand to new channels over time.
Explore our vast range of Headless Shopify optimization solutions and services catering to your unique challenges, business needs, and use cases.
We build customized headless Storefronts using Hydrogen, Oxygen, or custom frameworks like React and Next.js. This gives you flexibility to craft exceptional shopping experiences across channels and touchpoints.
Already have a Shopify website? We can migrate it to a headless architecture without disrupting your operations. You get all the benefits while keeping your store theme and customizations.
We create secure, scalable APIs and integrations that connect your decoupled storefront to backends like Shopify Admin and third parties. This enables unified data, smooth workflows, and automation.
The key advantage of headless Shopify is omnichannel commerce. We help you sell products and services across progressive web apps, mobile apps, and beyond, seamlessly synchronizing data and assets.
Our headless approach makes it easy to run and optimize hundreds of Shopify sites from one Admin panel. Centralize inventory, order processing, and reporting.
We build immersive progressive web apps that deliver app-like experiences across desktop and mobile. Offline capability, push notifications, better speed, and UX – PWAs increase engagement and conversions.
We're proud partners with Shopify, BigCommerce, and Magento, providing tailored solutions and access to the latest tools for your eCommerce success.


Migrating to Shopify can be a decision that accelerates your online store’s growth and conversions. Here’s why eCommerce leaders worldwide choose Shopify.
Shopify enables you to customize your store to align it better with your brand. We fully customize Shopify sites with your brand vision in mind. Our skilled developers create front-end experiences tailored to meet the goals of your business.
With proven experience in providing Shopify implementations to over 150 aspiring eCommerce brands worldwide, ur talented team blends creative design and robust engineering. We have deep expertise for delivering complex solutions at scale.
Shopify makes it easy for you to sell everywhere with multi-language support and built-in payment gateways. Our experts facilitate global growth with strategic partner integrations.
No need to worry about security, hosting and performance! Shopify handles everything including regular backups and near-perfect uptime. High availability and resilience ensure your business runs flawlessly 24/7.
As a Shopify Plus partner, we deeply understand the library of plugins and apps available. We strategically integrate the best third-party solutions to meet requirements around billing, ERP, fulfillment, email marketing, and more.
Shopify’s comprehensive infrastructure and extensive partner ecosystem enable quick time-to-market. We iteratively enhance and scale your stores with strategic roadmaps focused on long-term success.
For clearly defined projects, fixed headless Shopify pricing ensures predictable costs. We provide time and materials estimates upfront.
For businesses with evolving needs, our monthly Shopify headless eCommerce retainers offer flexible capacity and priority support.
We provide you with dedicated Shopify headless developers to accelerate your eCommerce innovation goals.
Headless commerce detaches the frontend and backend of ecommerce stores. The frontend can be highly customized using frameworks like React without changing backend platforms like Shopify. This flexibility lets you craft shopping experiences across channels. The investment pays off as your brand grows. Also, the theme cost splits over a long lifetime usage. Smaller stores should partner with Folio3 to hire Shopify developers and designers with expertise in optimizing custom themes for speed and conversion.
Costs vary based on project complexity and timelines. Onboarding helps provide estimates. For context, headless upgrades start at $75,000. Our models provide capacity flexibility to eCommerce enterprises.
If you want to expand sales channels, we recommend headless Shopify. Its API-driven flexibility lets you have progressive web apps and mobile apps alongside traditional ecommerce. Microservices also make experiences highly personalized.
Rather than recruiting, training, and managing an in-house team, partnering with specialists like us reduces costs and risks while accelerating speed to market.
Send in your details to get instant access to our calendar and book a convenient slot.
Please ensure to send sufficient details about your project so our experts can provide you the most value in the free consultation.
3080 Yonge Street, Suite 6060, Toronto, Ontario M4N 3N1
Amado Nervo #2200, Edificio Esfera 1 piso 4, Col. Jardines del Sol, CP. 45050, Zapopan, Jalisco, Mexico
C/- Prime Partners Level 4 1 James Place, NORTH SYDNEY New South Wales 2060
160 Bovet Road, Suite # 101, San Mateo,
CA 94402 USA
6701 Koll Center Parkway, #250 Pleasanton, CA 94566
Tel: +1 (408) 412-3813
Export House, Cawsey Way, Woking, Surrey, GU21 6QX
Tel: +44 (0) 14 8339 7625
Folio3 FZ LLC, UAE, Dubai Internet City,
1st Floor, Building Number 14, Premises 105, Dubai, UAE
Tel: +971 04 2505173
49 Bacho Kiro Street, Sofia 1000, Bulgaria
Folio3 Pvt. Ltd, Folio3 Tower, Plot 26, Block B,
SMCH Society, Main Shahrah-e-Faisal, Karachi.
Tel: +92-21-3432 3721-4
First Floor, Blue Mall 8-R, MM Alam Road Gulberg III, Lahore
Corporate 7 by Maaksons, Executive Block, Civic Center 1, Gulberg Green, Islamabad
Tel: 0333 5657425

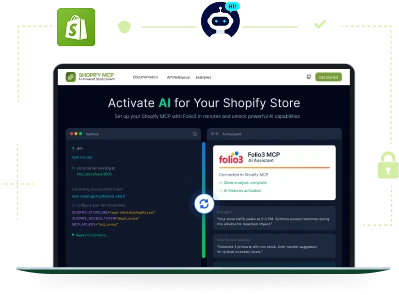
Set up your Shopify MCP with Folio3.