Executive Summary: Selling Other People’s Products on Shopify
-
Dropshipping Model: Sell products without holding inventory—suppliers manage stock and shipping while you earn profits.
-
Key Benefits: Low startup costs, global reach, wide product catalog, easy scalability, and focus on marketing over logistics.
-
Trends in 2025: AI-driven product research, blockchain for supply chain transparency, and AR features to boost shopping experience.
-
How to Start: Pick a profitable niche, find reliable suppliers (AliExpress, Spocket, AutoDS), build and brand your Shopify store, set up payments, and launch.
-
Success Factors: Stand out with excellent customer service, multi-channel marketing (SEO, social, paid ads, email), and sustainable products.
How To Sell Other People Products On Shopify
If you’re wondering how to sell other people’s products on Shopify, you’re in the right place. Shopify is a top platform for dropshipping, offering tools to easily manage and grow your online store.
This guide will cover how to find a niche, set up your store, and market it effectively. You’ll learn how to sell other people’s products on Shopify step by step.
Dropshipping on Shopify is easy to automate and integrate. Shopify has driven nearly $520 billion in sales and covers about 10% of the global eCommerce market.
Shopify has crossed a significant milestone, facilitating over $1 trillion in cumulative sales since its inception. The platform now powers 4.82 million active stores worldwide and commands approximately 10.56% of the global eCommerce market share, with an impressive 30% market dominance in the United States as of 2025.
Can You Sell Other People’s Products on Shopify?
Yes, it is possible to sell other people’s products on Shopify through a process called drop shipping. In dropshipping, a business owner partners with a supplier or manufacturer to list their products for sale on their online store.
When a customer places an order, the business owner then forwards the order to the supplier, who ships the product directly to the customer. The business owner does not have to keep an inventory or handle the shipping themselves but still earns a profit from the sale of the product.
This model has become increasingly sophisticated in 2025, with advanced automation tools, AI-powered product selection, and integrated fulfillment systems making it easier than ever to succeed
Benefits of Selling Other People’s Products on Shopify
Understanding the advantages is the first step in learning how to sell other people’s products on Shopify successfully:
| Benefit | Explanation |
| Low Startup Costs | Minimal initial investment compared to traditional retail—no inventory purchases required. |
| Wide Product Selection | Access thousands of products without holding inventory or warehouse space. |
| Reduced Risk | Lower financial risk as you only purchase products after making a sale. |
| Location Independence | Run your business from anywhere with an internet connection. |
| Scalability | Easily scale by adding more products, niches, or sales channels. |
| Flexibility | Quickly test and pivot to different products or niches based on market trends. |
| No Inventory Management | Avoid the hassle and costs of storing and managing physical inventory. |
| Focus on Marketing | Concentrate on marketing strategies, branding, and customer acquisition. |
| Time Efficiency | Save time on product sourcing, packaging, and shipping logistics. |
| Low Overhead Costs | No need for physical storefronts, warehouses, or extensive staff. |
| Global Market Access | Sell to customers worldwide, dramatically expanding your potential customer base. |
| Supplier Relationships | Build partnerships with suppliers for better pricing and exclusive products. |
| Quick Launch | Set up and launch faster than traditional retail businesses. |
| AI-Powered Tools | Leverage artificial intelligence for product research, pricing optimization, and customer service automation. |
| Sustainable Options | Access to eco-friendly products and suppliers meeting the growing consumer demand for sustainability. |
In 2025, dropshipping has evolved beyond basic reselling. Successful dropshippers now leverage AI for product selection, utilize blockchain for transparent supply chains, and implement augmented reality (AR) features to enhance customer experience and reduce return rates.
While dropshipping offers numerous advantages, it’s important to note that challenges exist, including intense competition, potentially lower profit margins, and dependence on third-party suppliers.

Successful dropshipping requires effective marketing, customer service, and continuous adaptation to market changes.
Low Shopify startup costs
Selling other people’s products on Shopify allows you to launch an online business with minimal upfront investment.
You don’t need to purchase inventory, rent warehouse space, or invest in shipping equipment, which can save thousands of dollars.
This low barrier to entry makes it accessible for entrepreneurs with limited capital. You can start small and reinvest your profits to scale gradually as your revenue grows.
Wide Range of Products to Organize in Shopify
Dropshipping enables you to offer customers an extensive product catalog without maintaining any inventory.
You can easily add or remove products from your store as market trends evolve and consumer preferences change.
This flexibility allows you to capitalize on emerging trends and seasonal demands without the financial risk of purchasing stock that may not sell. You can test multiple products simultaneously to identify your best sellers.
Scalability
As your business grows, you can effortlessly expand your product offerings and increase profit margins.
Unlike traditional retail, scaling doesn’t require proportional increases in overhead costs or warehouse space.
You can diversify into new niches, add complementary products, or even create multiple stores targeting different audiences—all without the logistical nightmares of traditional inventory management.
Easy To Manage
Shopify provides an intuitive, user-friendly interface with powerful tools for managing your online store, including inventory automation, order fulfillment tracking, and comprehensive customer service features.
The platform offers real-time analytics and detailed reports that help you make data-driven decisions.
In 2025, Shopify’s AI-powered analytics can predict trends, suggest pricing adjustments, and identify your most profitable products automatically.
Increased Reach
Selling other people’s products on Shopify gives you access to a global marketplace, enabling rapid business growth. With Shopify’s multi-channel selling capabilities, you can reach customers on social media, marketplaces, and your online store simultaneously.
Over 875 million people transacted with Shopify merchants in 2024, representing 1 in 6 internet users worldwide.
With 90% of merchants now connecting their stores to two or more sales channels, the potential reach has never been greater
List Of Steps On How to Start a Dropshipping Business on Shopify
Here’s your roadmap for how to sell other people’s products on Shopify:
- Choose a niche and find a supplier for the products you want to sell.
- Create a Shopify store and customize it to match your brand.
- Add products to your store and set up payment and shipping options.
- Drive traffic to your store through marketing and advertising.
We will be discussing all the steps in detail below:
How to Choose a Niche for your Dropshipping Store
Selecting the right niche is crucial when learning how to resell products on Shopify. Follow these strategic guidelines:
Identify A Problem Or Need
Look for niches that address specific problems or unmet needs.
Products that solve real issues tend to have higher conversion rates and better customer retention.
For example, ergonomic home office equipment for remote workers or eco-friendly alternatives to everyday products.
Consider Your Interests
Choose a niche that aligns with your passions and knowledge.
Your genuine enthusiasm will translate into better content, more authentic marketing, and sustained motivation during challenging periods.
When you’re knowledgeable about your products, you can provide better customer service and create more compelling product descriptions.
Research The Market
Thoroughly analyze market demand and competition levels. Look for products with high search volume but manageable competition—the “sweet spot” for new dropshippers.
Use tools like Google Trends, keyword research platforms, and competitor analysis tools to validate your niche selection before committing resources.
Look For Trends
In 2025, successful dropshippers monitor multiple trend sources: TikTok’s viral products, Instagram Reels, Pinterest boards, and AI-powered trend prediction tools that analyze search patterns and social media engagement.
Stay ahead of trends by following industry influencers, subscribing to trend newsletters, and using platforms like Google Trends to identify emerging opportunities.
Current high-growth niches for 2025 include:
- Sustainable and eco-friendly products (growing at 30% CAGR)
- Health and wellness items (market worth $946 billion)
- Smart home technology and IoT devices
- Fashion and beauty products (projected to reach $802.33 billion in 2025)
- Pet supplies and accessories (consistent year-round demand)
Consider Scalability
Select a niche with room for expansion and diversification. Your initial product line should allow for natural extensions into related categories as your business matures.
This strategic approach enables you to maximize customer lifetime value by offering complementary products to your existing customer base.
Learn How To Become a Reseller And Start Selling Right Away

How to Source Other People’s Products for Selling on Shopify
Finding reliable suppliers is essential for selling other people’s products on Shopify. Here are proven sourcing strategies:
Use a Dropshipping Supplier Directory
Directories like Oberlo, SaleHoo, and Worldwide Brands compile verified suppliers with their product catalogs, pricing, and shipping information. These platforms vet suppliers, reducing your risk of partnering with unreliable vendors.
Use AliExpress with Shopify
AliExpress remains popular for dropshipping due to its vast product selection and competitive pricing.
However, in 2025, consider shipping times carefully—many successful dropshippers now prioritize suppliers with warehouses in their target markets for faster delivery (3-7 days vs. 15-30 days from China).
Use A Dropshipping App
Modern dropshipping apps have evolved significantly:
- AutoDS: Offers AI-powered product research, automated price optimization, and hands-free fulfillment across multiple platforms.
- Spocket: Specializes in US and EU suppliers for faster shipping, with a focus on sustainable products.
- DSers: Optimized for AliExpress integration with bulk order processing
- CJ Dropshipping: Provides global warehousing for faster international fulfillment
Pro tip: In 2025, using WeChat remains valuable for contacting Chinese suppliers directly and negotiating better terms, especially for customized products or exclusive arrangements.
Contact Manufacturers Directly
Reaching out to manufacturers can yield better pricing, exclusive products, and customization options. Many manufacturers now offer dropshipping services, especially if you can demonstrate market reach or volume potential.
Research Competitors
Use tools like ImportYeti, Jungle Scout, or Commerce Inspector to discover your competitors’ suppliers. Simply enter a company name to view their supply chain details and shipping partners.
This competitive intelligence helps you identify proven suppliers and understand market pricing structures.
Attend Trade Shows
Both virtual and in-person trade shows remain valuable in 2025. Major eCommerce exhibitions now offer hybrid experiences, allowing you to connect with suppliers globally through virtual booths while still enabling hands-on product evaluation at physical venues.
Trade shows provide opportunities to negotiate terms, establish personal relationships, and discover unique products before they saturate the market.

Step-by-Step Guide to Creating a Website for Your Business in Shopify?
To streamline the process of how to sell other peoples products on Shopify, we’ve divided store creation into two phases:
Pre Subscription Steps
Complete these foundational tasks before purchasing your Shopify subscription:
Craft a Store Name, Logo, and Domain
Your store name should be memorable, easy to spell, and reflect your brand identity. It creates the crucial first impression for potential customers.
In 2025, consider using AI-powered naming tools like Namelix or Shopify’s own business name generator, which analyzes your niche and generates SEO-friendly, available domain names instantly.
Your logo serves as your brand’s visual identity. It should be simple, scalable, and convey your brand message effectively.
Tools like Canva Pro, Looka, or Shopify’s logo maker can create professional designs in minutes, with AI suggesting colors and styles based on your industry.
Your domain name should align with your store name and be easy to remember. It’s your online address—make it accessible and relevant. Beyond your storefront, create branded marketing assets such as brochures, which an AI brochure maker can help you produce quickly, along with flyers and social media graphics so customers encounter a consistent visual identity across every touchpoint.
Gather Photos and Videos
High-quality product imagery is non-negotiable. Images should be clear, well-lit, and show products from multiple angles without pixelation or color distortion.
2025 best practices include:
- Using AI background removal tools to create consistent product images
- Incorporating short-form video content (15-30 seconds) showing products in use
- Creating 360-degree product views or AR-compatible 3D models for complex items
- Including lifestyle photography that demonstrates product benefits
Organize Your Business Essentials
Proper legal setup protects your business and ensures compliance. While Shopify doesn’t require documentation during signup, you’ll need these documents as your store scales:
Business Registration
Determine your business structure—Sole Proprietorship, LLC, or S Corporation. Each has different tax implications and liability protections. Many entrepreneurs now use services like LegalZoom or Incfile to establish LLCs quickly and affordably. You can refer to business plan examples to guide your setup, ensuring your store aligns with financial, operational, and strategic goals from the start.
Tax Permit
Obtain a sales tax permit from your state’s department of revenue. In 2025, Shopify automatically handles sales tax calculations for most jurisdictions, but you still need valid tax IDs to receive payouts once you reach revenue thresholds.
While dropshipping doesn’t require physical inventory, tax compliance is mandatory once you start generating revenue.
Business Account
Open a dedicated business bank account to separate personal and business finances. This separation is essential for accounting, tax filing, and maintaining professional credibility.
Consider digital-first banks like Relay, Mercury, or Novo, which offer features specifically designed for eCommerce businesses, including automatic categorization and integrated invoicing.
Post Subscription
After securing your Shopify plan, follow these implementation steps:
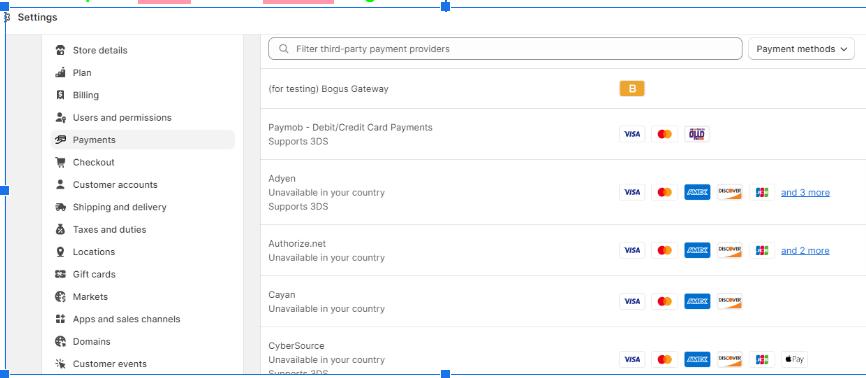
Set Up Payments
Configuring payment processing is critical for selling other people’s products on Shopify:
- Access your Shopify admin dashboard and navigate to Settings → Payment

2. Choose your payment gateway. In 2025, popular options include:
-
- Shopify Payments: Now available in 35+ countries with the lowest transaction fees and Shop Pay integration (200+ million users)
- PayPal: Still widely trusted, especially internationally
- Stripe: Excellent for customization and supports 135+ currencies
- Cryptocurrency Options: Consider adding crypto payments through BitPay or Coinbase Commerce to attract tech-savvy customer But don’t forget to set up a crypto tax software upfront to be aligned with all regulations and your tax form 1099-DA.
3. Follow the setup prompts, which include connecting to your bank account and entering business information.
4. Configure payment settings, including automatic payment capture, refund policies, and transaction preferences
5. Enable Shop Pay Installments for Buy Now, Pay Later (BNPL) options—this feature increased conversion rates by 15-25% for stores in 2024
6. Test your payment gateway thoroughly before launching to ensure seamless transactions
Add The Dropshipping Plugin
Dropshipping apps automate order fulfillment, transforming manual processes into seamless automation:
Top dropshipping apps for 2025:
- AutoDS: AI-powered features for price optimization and product research
- Spocket: US/EU suppliers for faster shipping (3-7 days)
- Zendrop: Custom branding and quality control services
- DSers: AliExpress integration with bulk order management
- CJ Dropshipping: Global warehousing for faster international fulfillment
Look for apps with real-time inventory sync, automated tracking, and multi-supplier integration to prevent overselling and ensure smooth operations.
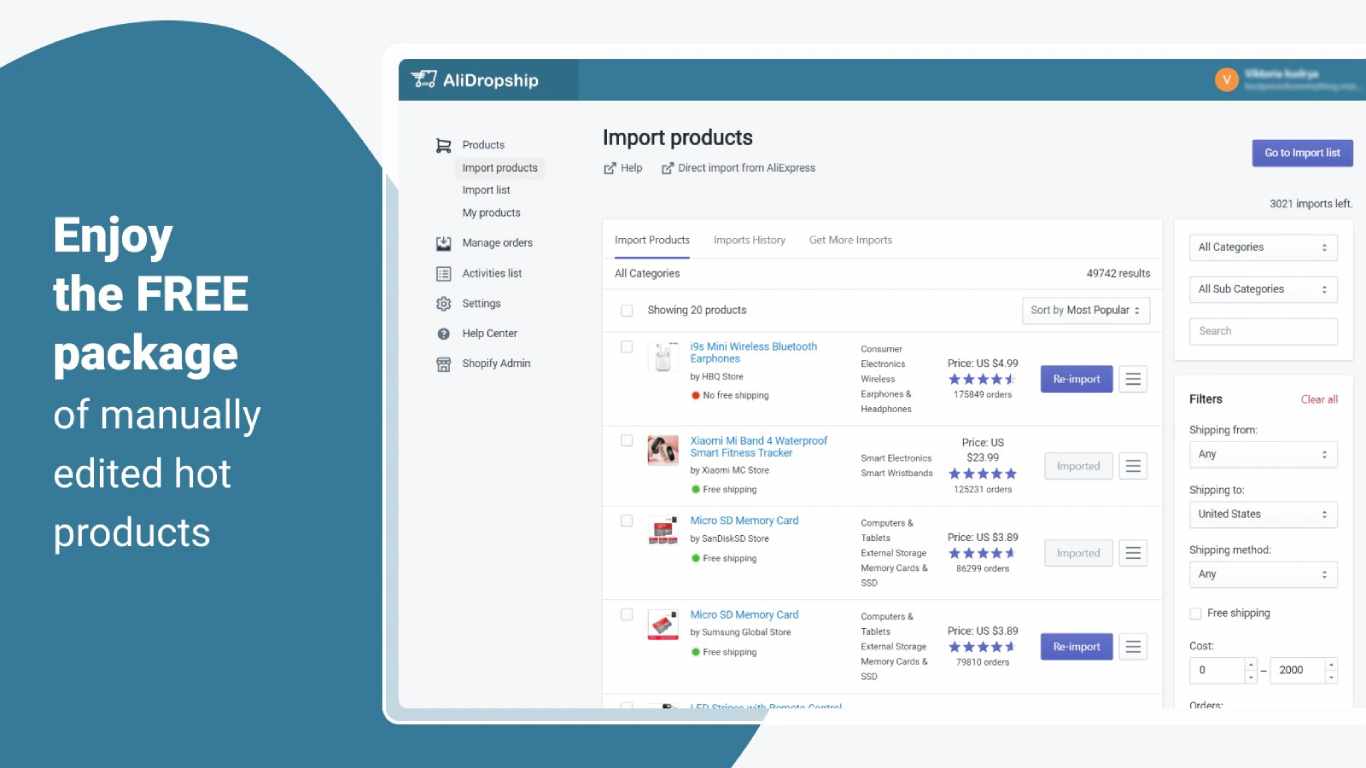
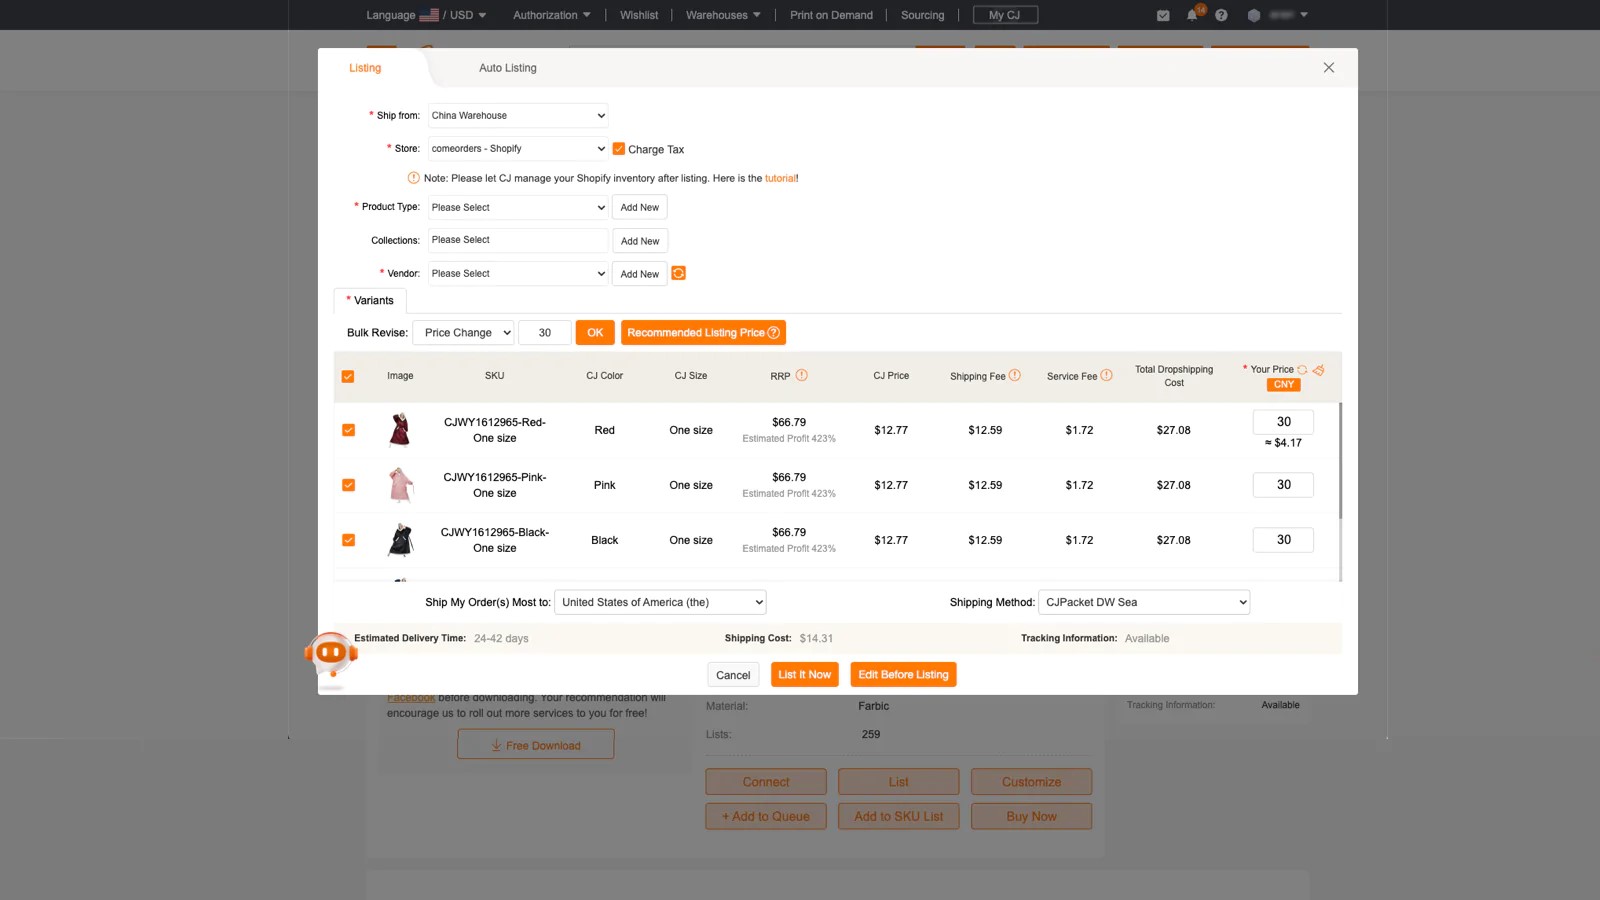
Add Products
The process of adding the product changes a bit by adding any dropshipping plugin.
For AliDropship, you have to select the products from AliExpress and simply import them to Shopify.
For Cj Dropshipping, you have to list the products from your CJDropshipping Dashboard and it will automatically appear in your store.
Moreover, you can always edit your product after adding them due to Chinese descriptions most of the time. Just head to Products->Edit Product in your Shopify Dashboard.
You can follow the below steps:
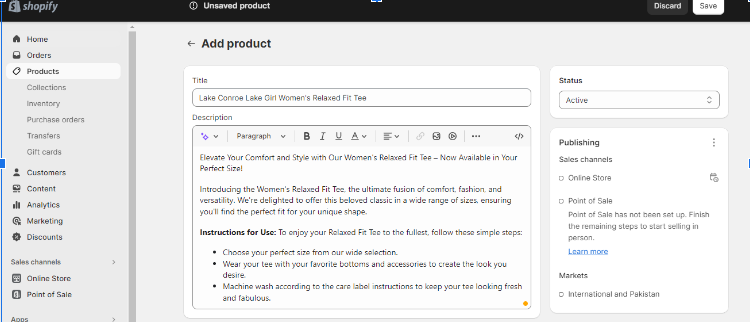
- Navigate to the “Products” section of your admin dashboard.
- Click on the “Edit Product” button.
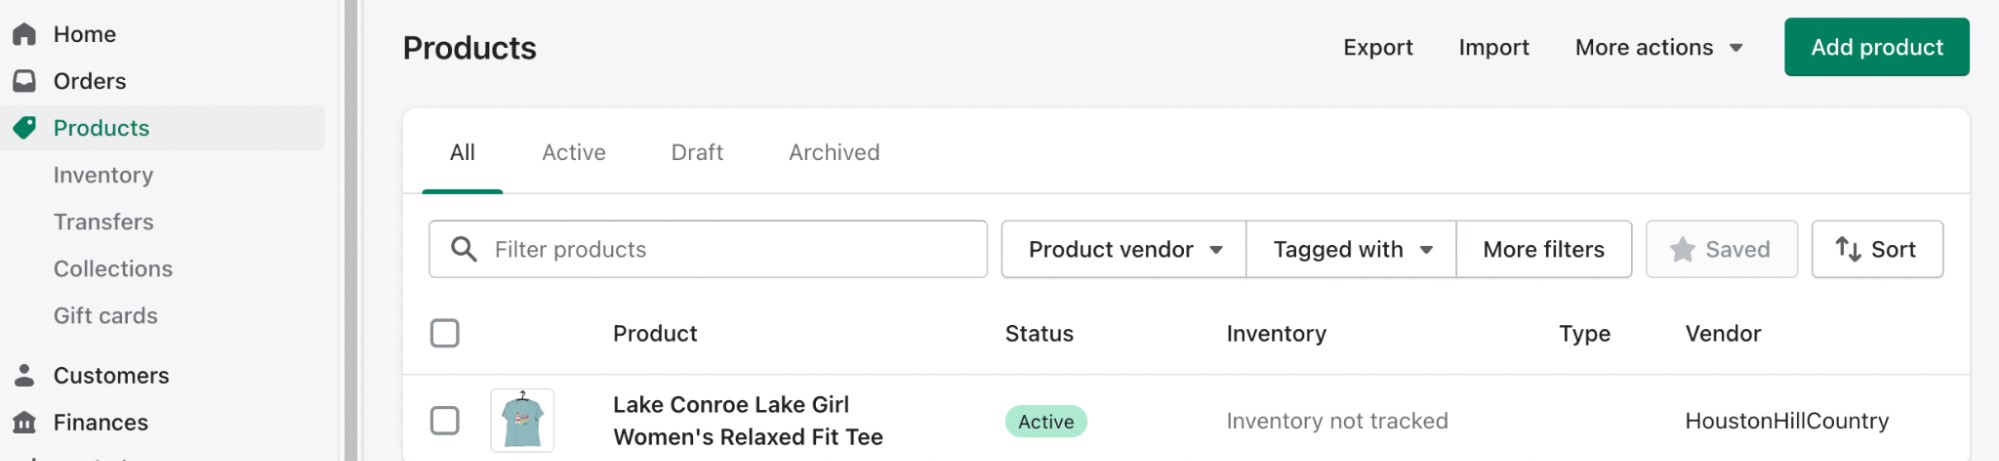
3. Change the product details, including the product title, description, and price.
Read Also How to sell customized products on Shopify
4. Add images of the product by clicking on the “Add Images” button. You can upload images from your computer or link to images hosted on other websites.
5. Set up the product options, such as size, color, or material.
6. Create a product variant, which allows you to create different options for the same product, such as different sizes or colors.
7. Set up the product’s inventory and track the stock.
8. Create product tags, which are keywords that help customers find your product when searching your store.
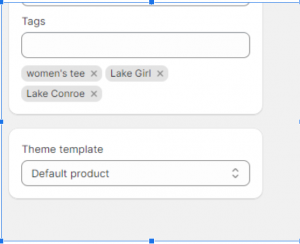
9. Choose whether to charge taxes or shipping fees for the product.
10. Finally, click on the “Save” button to publish your product.
It’s a good idea to review your product page before publishing it to make sure everything is set up correctly and that it’s easy to understand for the customer. Remember, you can always edit and make changes to your products at any time in the future.
Finally, if you want to show specific products on the website, then simply Hiding Products in Shopify should help you.
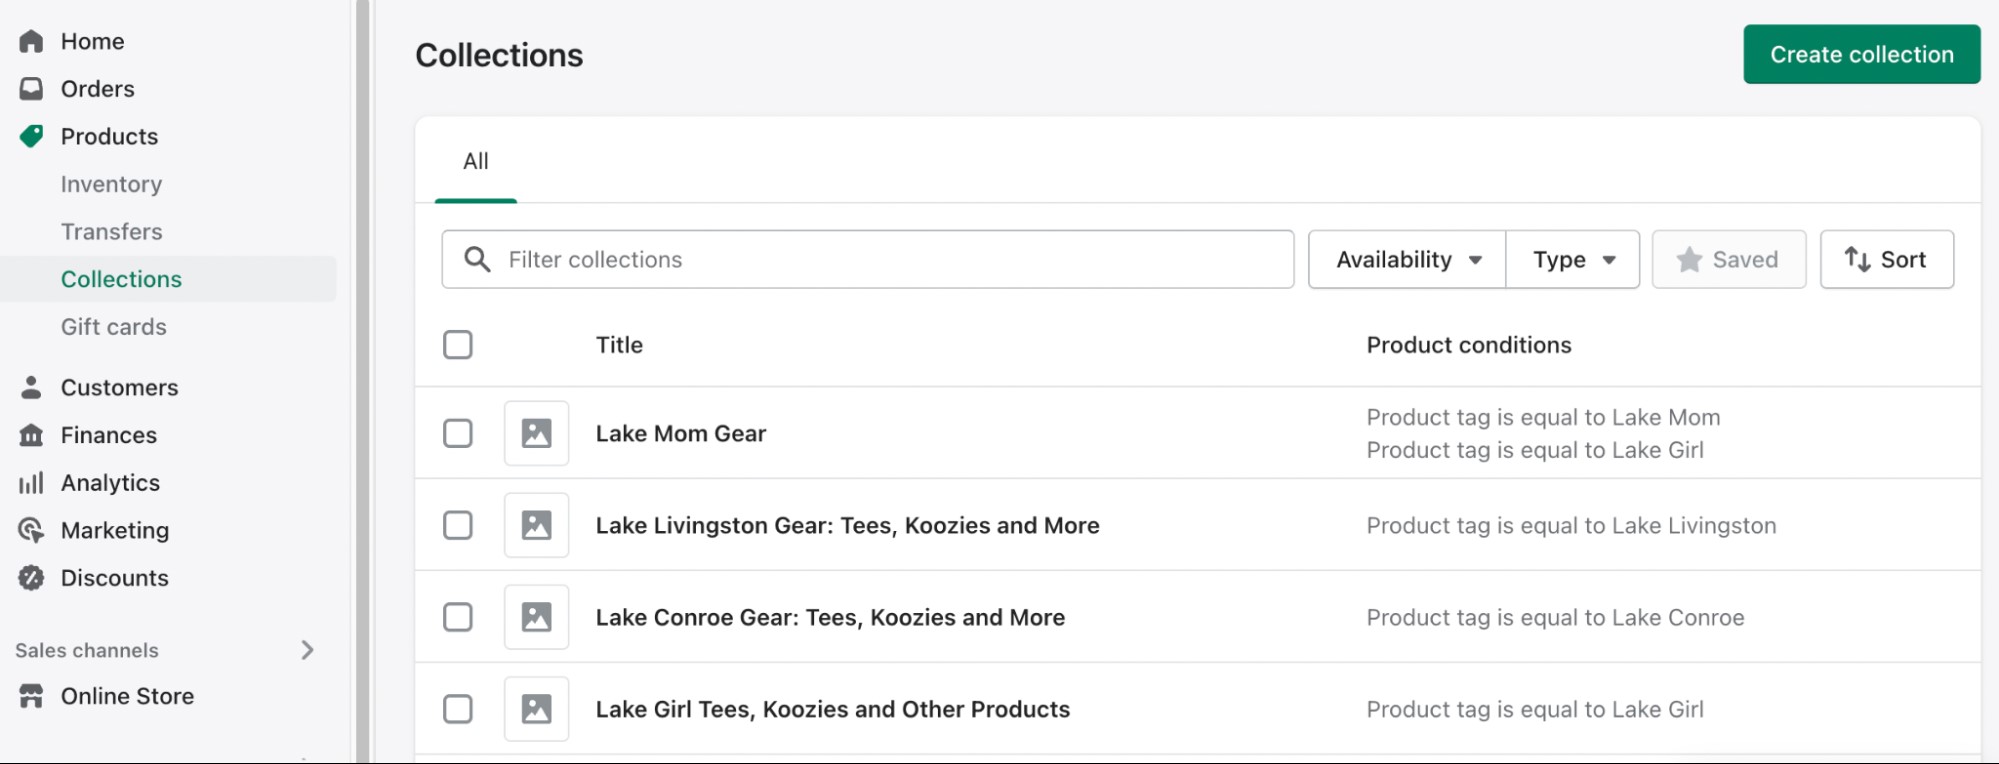
Create Some Collection Pages
Organize products into logical categories for better navigation:
- Go to Products → Collections → Create Collection
- Name your collection with SEO-friendly titles
- Set conditions (manual or automated based on tags/price)
- Create seasonal, trending, or bestseller collections that update dynamically
Read more: Best Shopify Shipping Apps to Increase Sales
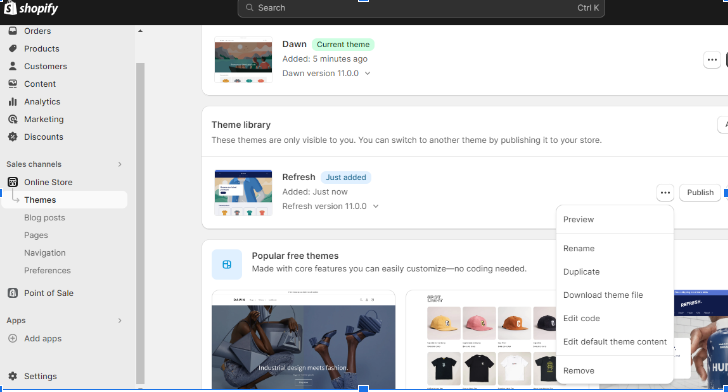
Set Up Your Shopify Theme
Adding a theme to your Shopify store is a simple process that allows you to customize the look and feel of your website. Here are the steps to add a theme to your Shopify store:
- Navigate to the “Themes” section in your Shopify Dashboard.
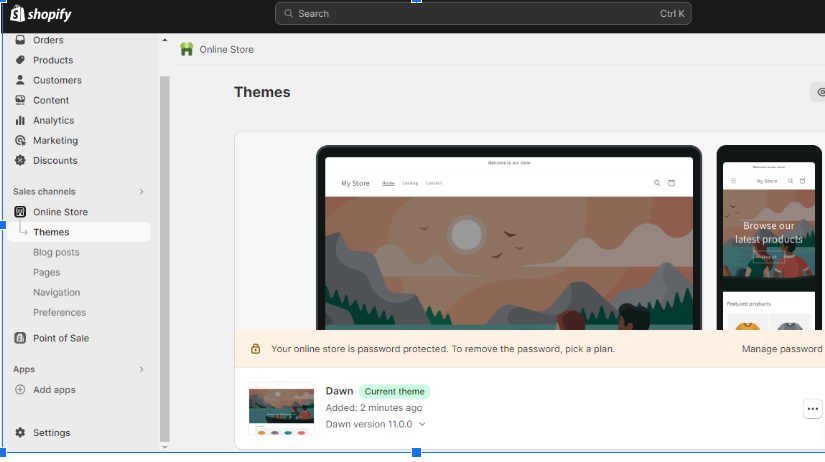
2. Click on the “Visit Theme Store” button to browse the available themes. You can filter the themes by industry, style, and features.
3. Preview a theme by clicking on the “Preview” button. This will give you an idea of how the theme will look on your website.
4. Once you’ve found a theme you like, click on the “Add Theme” button.
5. You’ll be prompted to choose whether you want to install the theme on your current store or on a new store. Choose the appropriate option and click “Add Theme.”
6. After the theme is added, you can customize it by clicking on the “Customize” button. This will open the theme editor, where you can change the layout, colors, fonts, and other settings.
7. Once you’ve finished customizing the theme, click on the “Save” button to apply the changes to your store.
8. If you wish to make any further Shopify theme customizations, you can install additional apps and edit the theme code as well.
Keep in mind that you can always change your theme later on if you decide you want a different look for your store. Moreover, you can also contact Shopify Maintenance Services to integrate Headless Shopify solutions for the automation of the business, whether you’re running a general dropshipping store or focusing on specialized areas like jewelry ecommerce development.
Place a Test Order and Go Live
Before launching:
- Use Shopify’s test mode to create a dummy order
- Complete the entire checkout process
- Verify order confirmations and supplier notifications
- Test on multiple devices and browsers, especially mobile
- Fix any issues, then remove test mode and launch!
How to Sell Other People’s Products on Shopify and Market Your Store
Drive traffic and sales with these proven strategies:
Use Social Media Platforms
Promote your store and products on platforms like Instagram, Facebook, and Twitter. Create engaging content and leverage influencer marketing to reach a wider audience. Influencers can boost your brand’s visibility and drive sales.
Instagram:
- Create Reels (3x more engagement than posts) and use Instagram Shopping</mark>
- Partner with micro-influencers (10K-100K followers)
- Post 4-5 times weekly with consistent branding
TikTok:
- Fastest-growing sales channel with native shopping integration
- Create authentic content—users prefer genuine reviews over polished ads
- Use trending sounds and hashtags; consider TikTok Shop
Facebook & Pinterest:
- Join niche groups and use retargeting pixels
- Pinterest users have 2x higher purchase intent—ideal for lifestyle products
Optimize Your Store for Search Engines (SEO)
Ensure your Shopify store is optimized for search engines like Google and Bing. Use relevant keywords, meta tags, and high-quality content to improve your store’s ranking, making it easier for customers to find you.
- Conduct keyword research (Ahrefs, SEMrush)
- Write unique 300+ word product descriptions
- Start a blog for organic traffic and authority
- Optimize for voice search with conversational keywords
- Ensure fast loading speeds and mobile optimization
- Implement Schema markup for enhanced search results
Offer Discounts and Promotions
Encourage purchases by offering discounts and promotions. Use email campaigns, social media posts, or website banners. You can offer discounts to newsletter subscribers or run time-sensitive promotions to boost sales and attract new customers.
- Welcome discounts (10-15% for first-time buyers)
- Abandoned cart emails with special offers
- Free shipping thresholds increase order value by 30%
- Flash sales and bundle deals
- Use Klaviyo or Omnisend for automated campaigns

Leverage Paid Advertising
- Google Ads: Focus on Shopping campaigns and Performance Max
- Facebook/Instagram Ads: Start with $10-20/day; video ads outperform static by 35%
- TikTok Ads: Lower cost per click, highly effective for Gen Z/Millennials
- Influencer Marketing: Micro-influencers (1K-50K followers) offer best ROI
Implement Email Marketing
Email delivers $42 ROI for every $1 spent:
- Build lists with pop-up discounts
- Send welcome series and abandoned cart sequences (recovers 10-30% of carts)
- Use Klaviyo, Omnisend, or Mailchimp for automation
Utilize User-Generated Content
- Encourage customers to share photos/videos with branded hashtags
- Feature customer content on product pages and social media
- Use Loox or Yotpo for automated review collection
Conclusion: Key Steps to Selling Other People’s Products on Shopify
To build a profitable Shopify dropshipping business: identify a niche aligned with market demand, source from reliable suppliers (AutoDS, Spocket, AliExpress), and customize your store with strong branding.
2025 success requires: superior customer experience, AI-powered tools, sustainable products, and multi-channel marketing (social, SEO, paid ads, email).
The dropshipping market will reach $464.4 billion in 2025, with fashion ($802.33B), beauty ($672.2B), and home & garden ($130B) leading growth.
Ready to start? Research your niche, choose reliable suppliers, and take action today.
FAQs About Selling Other People’s Products on Shopify
Can I sell secondhand items on Shopify?
Yes, you can sell secondhand or used items on Shopify as long as they comply with Shopify’s terms of service and local laws.
How to sell third party products on Shopify?
You can sell third-party products through dropshipping apps, supplier partnerships, or by getting resale rights from the brand.
How to make money selling other people’s products?
Profit comes from setting a markup on supplier prices and driving sales through effective marketing and branding.
How much does Shopify take from a $100 sale?
On Shopify Payments, fees range from 2.9% + 30¢ to lower rates on higher plans—so roughly $2.90–$3.20 on a $100 sale.
Can you sell products that aren’t yours on Shopify?
Yes, through dropshipping or resale agreements, you can sell products without owning or manufacturing them.
Can you sell someone else’s products on Shopify?
Yes, but you need permission (or a supplier arrangement) if selling branded items to avoid copyright or trademark issues.
If I have a Shopify store, can I sell someone else’s product?
Absolutely, provided you have the legal right to resell or partner with a supplier for fulfillment.
Is it possible to sell used items on Shopify?
Yes, many merchants run resale, vintage, and thrift stores on Shopify—just ensure accurate descriptions and quality checks.
How does selling another Shopify store’s products work?
Typically, you’d set up a dropshipping agreement, affiliate partnership, or wholesale arrangement rather than directly reselling without consent.