Magento Web Development Agency for Scalable, Future-Ready Stores
Our Magento (Adobe Commerce) development company builds solutions that connect your store with ERP, CRM, and fulfilment systems, enabling smoother operations and faster growth.
- 50+ Certified Experts
- Smarter System Integrations
- Scalable Store Performance

Book FREE
Magento Demo
Begin with our Adobe Commerce certified developers for a successful project start.
Overcome Magento Challenges to Build a Better Store
Challenge
Heavy themes, bloated code, and weak server setups often slow Magento stores, hurting SEO and conversions.
Our Solution
As a trusted Magento web development agency, we fine-tune performance with optimized code, caching (Varnish), Redis setup, image compression, and server optimization for Magento 2 development services best practices while enhancing TTFB, reconfiguring indexers, and tuning ElasticSearch for faster load and smoother user journeys.

Challenge
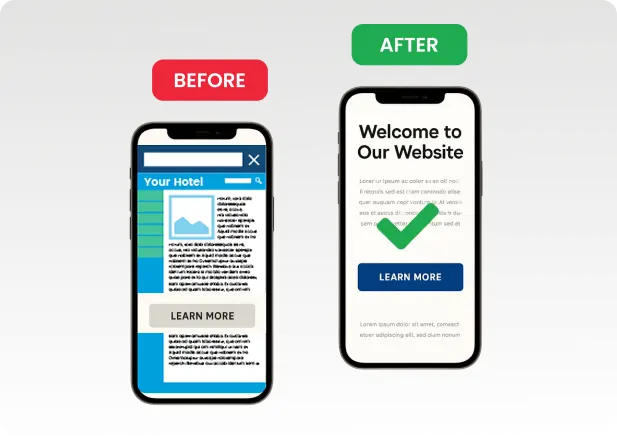
Over 70% of ecommerce traffic comes from mobile, yet many stores load poorly or deliver inconsistent layouts.
Our Solution
Our Magento ecommerce developers craft responsive, mobile-first storefronts and PWAs using Magento PWA Studio or React/Next.js frameworks, ensuring app-like speed, optimized visuals, and seamless navigation across all devices.
Challenge
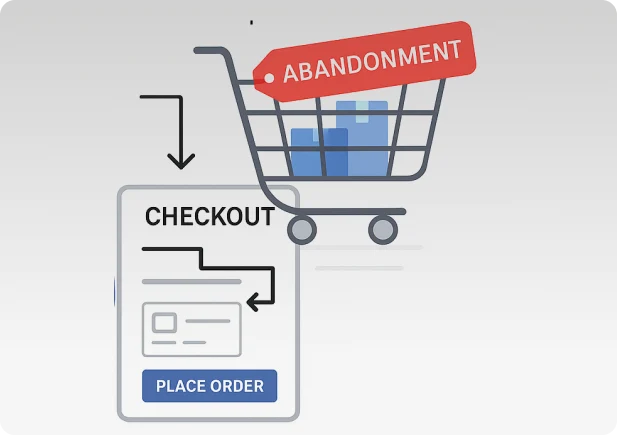
Magento’s default checkout can feel long and confusing, causing cart abandonment.
Our Solution
Our Magento store development company simplifies checkout with one-step extensions, quick payment options, and smart shipping calculators while using AI-driven checkout analytics to identify drop-off points and improve conversions.
Challenge
Unstable or incompatible third-party extensions often cause crashes and poor UX.
Our Solution
Our certified team at Folio3 audits, rebuilds, and refactors modules following Magento development services standards with automated code audits and regression testing pipelines to ensure stability, security, and long-term scalability.

Challenge
Delaying upgrades exposes stores to security risks, outdated features, and compatibility issues.
Our Solution
Our Magento website development company manages complete upgrades, from Adobe Commerce patches to extension testing and deployment, while handling platform migrations (Shopify, WooCommerce, BigCommerce, etc.) with zero SEO loss and full data retention.

Challenge
Default Magento setups struggle with complex B2B needs like custom pricing, quotes, or bulk ordering.
Our Solution
As an experienced Magento web development agency, we tailor Magento for B2B with dynamic catalogs, quote workflows, and credit-limit rules integrated across ERP, CRM, and POS systems for unified multi-store and omnichannel operations.

Challenge
Many agencies end support post-launch, leaving stores without maintenance or security monitoring.
Our Solution
Folio3 provides ongoing Magento ecommerce development services with real-time security scans, proactive performance audits, feature upgrades, and 24/7 monitoring to keep your store secure, fast, and ready to scale.


Adobe Certified Expert-Adobe Commerce Developer

Adobe Certified Master – Adobe Commerce Architect

Adobe Certified Expert-Adobe Commerce Business Practitioner
Magento Development Services We Offer
Folio3, a trusted Magento web development agency, provides end-to-end ecommerce solutions that improve functionality, performance, and scalability for growing online brands through expert Magento design, development, and integration practices.

Magento Design Services
Tailored layouts and responsive themes created by a Magento website development company that focuses on customer experience, visual appeal, and conversion-ready interfaces for modern ecommerce stores.

Magento Development Services
Full-cycle Magento development services covering store creation, customization, and upgrades to ensure code quality, scalability, and adherence to Adobe Commerce standards for long-term stability.

Magento Integration Services
Secure connections built by a Magento ecommerce development company to link your store with ERPs, CRMs, and third-party platforms for automated data flow and unified business operations.

Custom Magento Development
Custom solutions delivered by an experienced Magento development company offering APIs, plugins, and workflow automation tools that extend Magento’s capabilities and streamline store management.

Magento Extensions Modules
Reliable add-ons engineered by certified Magento ecommerce developers to enhance store performance, improve checkout flow, and simplify backend control through stable, well-tested integrations.

Magento Migration Upgrade
Seamless transitions managed by a Magento 2 development company provide secure data transfer, zero SEO loss, and full compatibility when migrating or upgrading to Magento 2 development services.

Magento Performance Optimization
Technical enhancements provided by a Magento development service team specializing in TTFB tuning, cache configuration, and code optimization to deliver faster load times and higher engagement.

Magento Support Maintenance
Comprehensive monitoring handled by a Magento website development services partner offering 24/7 maintenance, patching, and version updates to keep ecommerce sites secure, stable, and efficient.
ERP CRM Connectors
ERP and CRM integration powered by a Magento store development company, linking Magento with NetSuite, Microsoft Dynamics, and Salesforce for synchronized inventory, orders, and reporting.
Get Expert Help With Magento Development!
We make development simple, strategic, and results-driven.
Check out our Magento Projects
Folio3 has more than fifteen years of experience in designing and developing B2C and B2B ecommerce solutions and services to companies of different sizes.

- Automotive
- Magento
Multi-Region B2B Growth with Magento

- healthcare
- Magento 2
Custom Magento for Dental Sales Boost

- Life Sciences
- Magento 2
Unified eCommerce for Life Sciences

- Apparel / B2B
- Magento + Netsuite
Magento B2B Portal for Apparel Brand
Magento Web Development Agency Driven by AI
AI now defines how top stores perform. Our Magento 2 development services integrate machine learning for personalized shopping, dynamic pricing, predictive analytics, and automated marketing. Through AI-powered chatbots, visual search, and smart forecasting, our magento ecommerce development services give you measurable performance and sharper customer insight.
So, don’t look at AI as just a feature; look at it as the foundation of how modern ecommerce grows. Every search, click, and purchase can teach your store to respond smarter. As a forward-thinking Magento development company, Folio3 builds systems that learn from real customer behavior, automate repetitive work, and unlock faster decisions that drive real growth.

Ready to Start Your Magento Project?
Work with a Magento web development agency that builds fast, scalable, and conversion-focused ecommerce stores. Whether it’s a custom Magento 2 development service or full-store implementation, our certified team makes sure your build runs smoothly from strategy to launch.
Smart Magento Solutions That Drive Growth
Building a Magento store is just the start. As a full-scale Magento web development agency, Folio3 helps brands automate operations, personalize experiences, and use technology to keep growing long after launch.
AI Commerce Intelligence
Through AI-powered personalization and predictive analytics, our Magento web development agency helps stores automate product recommendations, pricing, and marketing, creating smarter shopping journeys that boost sales and retention.
Headless PWA Experience
Modern Magento 2 development company expertise delivers React and Next.js storefronts for lightning-fast, app-like performance and improved SEO - ideal for brands seeking a scalable headless architecture.
Mobile App Development
Native and hybrid apps built by skilled Magento ecommerce developers extend your store’s reach with seamless browsing, personalized push notifications, and real-time order tracking across iOS and Android.
Marketplace Architecture Design
Enterprise-grade solutions from our Magento ecommerce development company enable multi-vendor marketplaces with automated commissions, inventory sync, and intuitive vendor dashboards for simplified management.
B2B Commerce Enablement
Advanced Magento development services that support complex workflows like custom catalogs, quote approvals, and account hierarchies, built to streamline enterprise operations and drive high-value sales.
Generative AI Solutions
Innovative Magento 2 development services powered by machine learning create dynamic content, personalized product displays, and intelligent recommendations for a tailored customer experience.
API Integration Framework
A dedicated Magento development company connecting your store to ERP, CRM, and third-party systems through secure REST and GraphQL APIs for real-time automation and unified data flow.
Performance and Security
Speed and stability enhanced by a Magento website development company through optimized caching, CDN configuration, and continuous patching that keep your store fast, secure, and reliable.
Ongoing Growth Support
Long-term success powered by a Magento development agency offering version upgrades, code audits, and 24/7 monitoring to keep your ecommerce platform scaling with your business.
Turn Your Magento Store into a Growth Engine
Get a no-cost project quote from a certified Magento development company that’s helped brands boost conversions, streamline operations, and scale profitably.
Our Magento Integration Solutions



















Can’t find the Integration Solution you were looking for?
Why Choose Folio3 for Magento Development Services
Choosing the right Magento web development agency can define your store’s success. With certified experts, proven frameworks, and years of ecommerce experience, Folio3 delivers Magento development services focused on performance, scalability, and measurable business growth.

Proven Expertise
Over a decade of experience delivering Magento 2 development services that combine enterprise logic, smart integrations, and long-term reliability.

Certified Developers
A team of certified Magento ecommerce developers skilled in Adobe Commerce, custom extensions, migrations, and performance optimization.

Agile Execution
Every project follows agile Magento development service practices, from planning to delivery – promising speed, transparency, and quality output.

End-to-End Support
Comprehensive post-launch Magento website development services, including upgrades, audits, and 24/7 technical maintenance for sustained store growth.
The Process Behind Every Magento Success
Every successful store starts with a clear, expert-led process. At Folio3, our certified team follows an agile approach to deliver tailored, high-performing solutions that keep your Magento web development services on time, on budget, and ready to scale.

Project Discovery
Share your project goals and requirements so our team can understand your vision and technical needs.

Strategic Planning
Our Magento development company reviews your scope, maps the architecture, and finalizes the plan aligned with goals.

Design & Development
Expert Magento ecommerce developers bring your store to life through clean code, responsive design, and integrations.

Testing & Launch
Comprehensive QA to keep everything running smoothly. Once approved, your store goes live, optimized for performance.

Pick the Right Model for Magento Development Services
Choosing the right partner for Magento ecommerce development services can shape the success of your store. As a trusted Magento web development agency, Folio3 offers flexible engagement models designed to match your goals, timeline, and budget, giving you full control over your Magento project from start to finish.
Fixed Cost Model
Best for clearly defined Magento projects with specific scope, timeline, and deliverables. This model gives you predictable pricing while making sure your store is built by certified experts following Magento development services best practices. You’ll know your total cost upfront with no hidden surprises.
Dedicated Hiring Model
Ideal for long-term projects, upgrades, or ongoing store management. You get a dedicated team of certified Magento ecommerce developers who work exclusively on your project, offering flexibility, faster response times, and complete visibility over every task.
Build Your Own Team
Perfect for enterprises that need scalability and complete control. As a full-scale Magento development company, Folio3 helps you assemble a team of developers, designers, and QA engineers tailored to your requirements, with full transparency, direct collaboration, and easy resource scaling as your business evolves.
Ambitious Brands Endorse Folio3’s eCommerce Development Services
We’ve delivered world-class Magento eCommerce development services to enterprises and startups with a 100% Satisfaction rate. Our clients love us!

Terri Anne Meyer Head of Digital Marketing
We have been working with Folio3 since 2018. We are extremely fortunate to have found such a fantastic team of people. They are professional, organized, time-sensitive, and their work is stellar. Most recently, we needed support with dynamic schema mark-up and GA4 event integrations.
![]()

Omar M. Al-Midani Co-Chief Executive Officer
As you know our project is quite complicated & involves some fairly intricate customizations. Overall we are very happy with the progress so far. We feel that your team understands our requirements very well & also anticipates issues & provides effective solutions.
![]()

Dinara Etshman Project Manager
The Folio3 team is a pleasure to work with. During the project, they were responsive and their turnaround time was always stellar.
![]()
Frequent Ask Questions?
How Long Do You Take To Build A Website With Magento?
The time for Magento eCommerce development services relies on the complexity of the project, its customization, and the features and functions needed. At Folio3, we work closely with our clients to understand their business needs and give them a reasonable timeline for the project. We try hard to come up with high-quality services within the time limit.
How Much Do Magento Development Services Cost?
The cost of Magento eCommerce development services differs depending on the needs of a particular project. Folio3 has different pricing plans that can be changed to meet the needs of other businesses. There are various ways to pay for our services, like a set cost, hiring a dedicated team, or building your team.
Does Folio3 Offer Post-Development Support For Magento websites?
Yes, we offer ongoing maintenance and support for Magento websites. As part of our support services, we fix bugs, add security patches, update our website, and help with technology issues. We know how important it is to keep a website's security and functionality in good shape, so we make sure that our client's websites are always up to date and work well.
Can Folio3 Integrate Third-Party Systems With Magento Websites?
We can help you connect Magento to systems like ERP, CRM, and payment gateways. Our developers have much experience integrating Magento with third-party systems to improve how websites work and make business operations run more smoothly.
How Does Folio3 Ensure The Quality Of Its Magento development services?
At Folio3, we have a strict quality assurance method that involves testing and validating at every stage of development. We make sure that our Magento websites are safe, scalable, and easy to use by following best practices and guidelines in the industry. We also offer monthly maintenance and updates to ensure our client's websites are always up-to-date and working well.
Are You Into Magento Mobile App Development?
Yes. Our mobile apps have gotten much attention from businesses and the general public. We can help you make native and cross-platform apps, advise you on UI and UX, and do much more. We offer mobile app development in two ways: a native mobile app for each platform or a single cross-platform mobile app that supports multiple platforms.
Why Should I Choose a Magento Web Development Agency Over a Freelancer?
Partnering with a professional Magento web development agency gives you an edge to get an experienced, full-stack team, covering strategy, design, development, testing, and long-term support. Unlike individual freelancers, an agency brings process, accountability, and cross-disciplinary expertise to deliver secure, scalable, and on-time ecommerce solutions.
What Makes Folio3 a Reliable Magento Store Development Company?
As a trusted Magento store development company, Folio3 focuses on building stable, high-performance stores backed by years of enterprise ecommerce experience. Our Magento development service model combines certified developers, agile workflows, and end-to-end quality control to make every store we launch deliver on both technical standards and business goals.
Book a discovery call with our experts.
Send in your details to get instant access to our calendar and book a convenient slot.
Please ensure to send sufficient details about your project so our experts can provide you the most value in the free consultation.
