Before launching your Shopify store, it’s crucial to conduct a test order to ensure everything runs smoothly. The practice of Test Shopify Credit Card Payments, recommended by Shopify and experts, offers valuable insights. If you’re unsure about the process, fear not. I’ll guide you through performing a test order on Shopify using the provided Shopify test credit card numbers.
Why do you need to make a test order?
Testing orders helps preempt potential customer issues. Identifying and resolving these problems pre-launch guarantees a smooth user experience. Additionally, verifying your eCommerce store’s checkout functionality is crucial.
Testing the Shopify store’s checkout process yields two vital insights: system functionality and user experience assessment. This presents an opportunity to deliver flawless eCommerce experiences to customers, enhancing their online shopping journey.
Exploring Shopify Payments Test Mode
Fortunately, Shopify Payments provides a test mode to evaluate customer payments. Merchants can activate this mode to utilize test credit card numbers for simulating successful and failed transactions. When using Shopify Payments test mode, remember:
- Do not test in production mode.
- Avoid using real credit cards for testing.
- Local payment methods are not available during test checkout.
- Refrain from fulfilling test orders to prevent charges for shipping labels.
- Disable test mode once testing is complete.
If Shopify Payments is not in use, the Bogus Payment Gateway by Shopify can be employed for testing payments.
Setting Up Shopify for Test Transactions
1) Enable Shopify Payments Test Mode
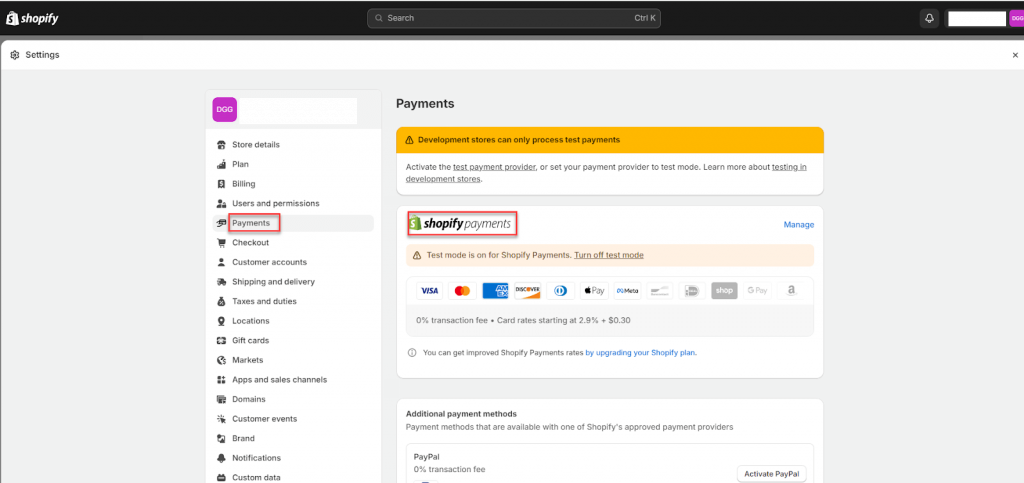
Step 1: Go to Shopify Admin > Settings > Payment
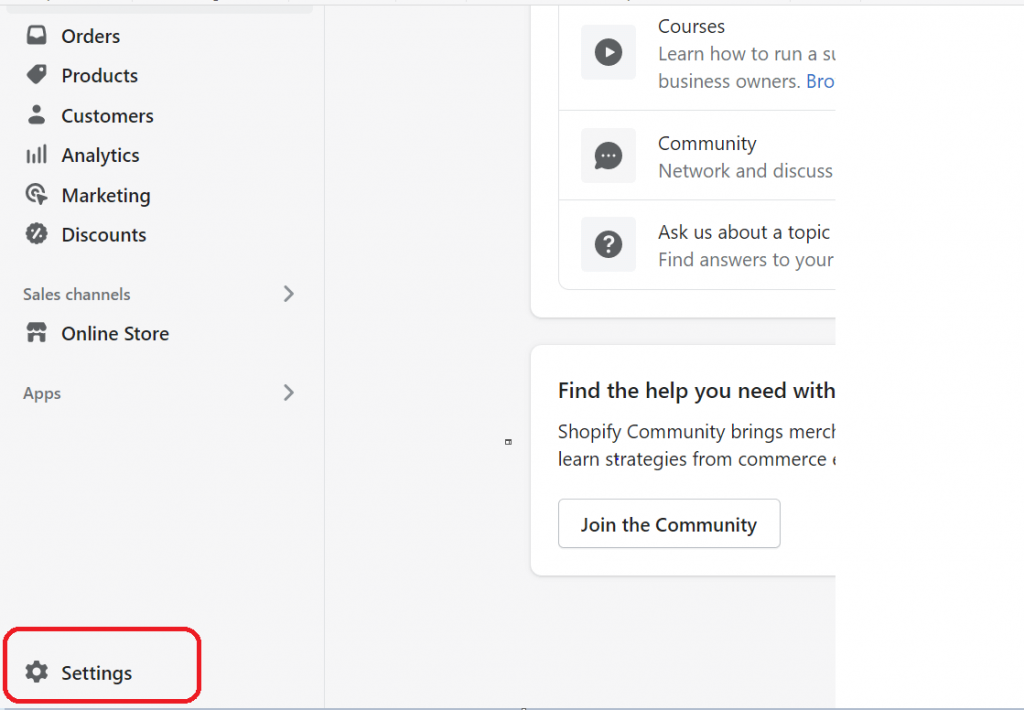
First of all, log into your Shopify admin using valid credentials.
In the admin section, click the settings icon in the bottom-left corner, and go to Payment in the settings menu.
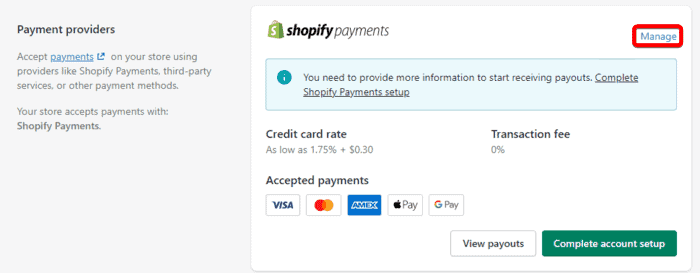
Step 2: Manage Shopify Payments
In the payment providers section, click Manage in the top-right corner of the Shopify Payments section.
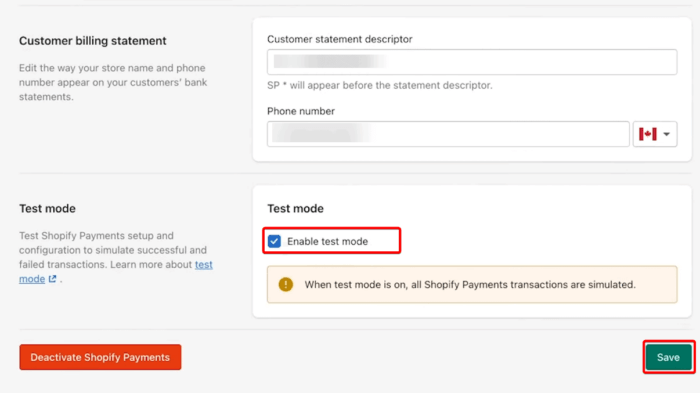
Step 3: Enable Shopify Payments Test Mode
Scroll down to the Test mode and enable it by checking the box (as shown in the screenshot below).
Lastly, hit the Save button!
You’ve successfully enabled the Shopify payments test mode.
2) Use Shopify’s Bogus Gateway (Optional)
If you’re using Shopify Payments, you can also enable the Bogus Gateway for testing.
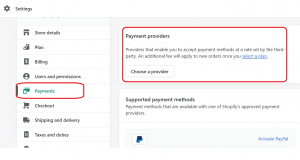
First, Go to Settings.
Under Settings, you can select Payments > Payment Providers.
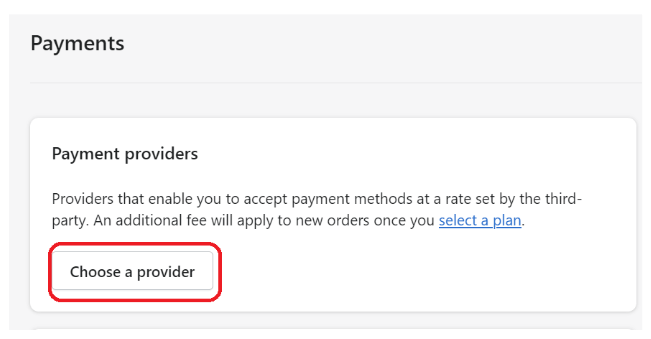
Step 3: Click on the Choose a Provider option next.
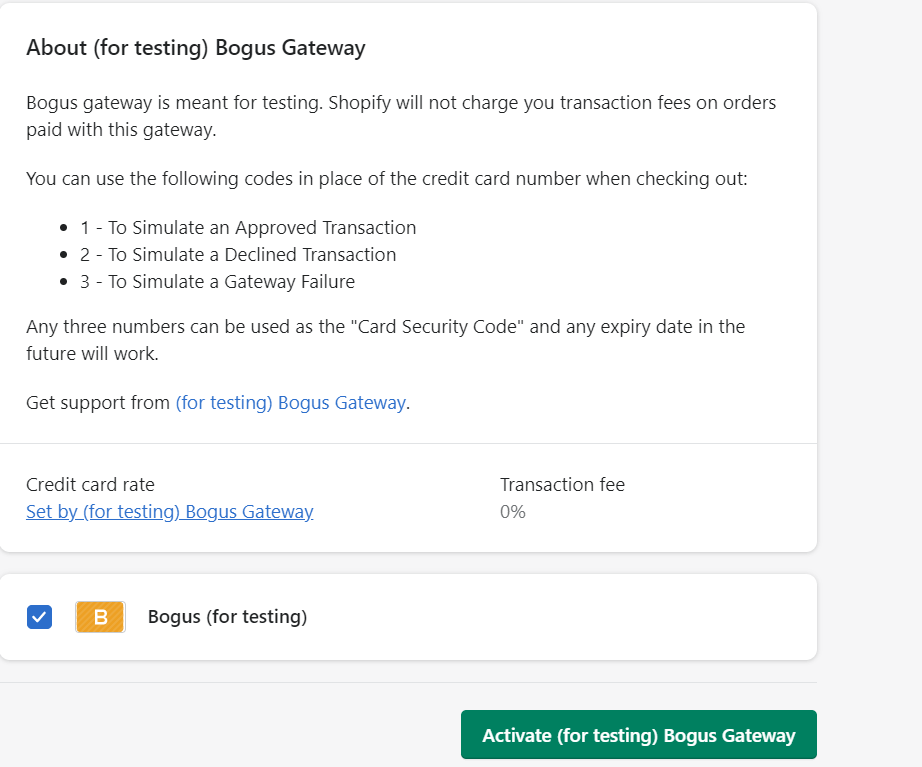
Step 4: Enable the Test Mode by Clicking on the Bogus Gateway option for testing
Step 5: Click on activate the Bogus Gateway for testing option.
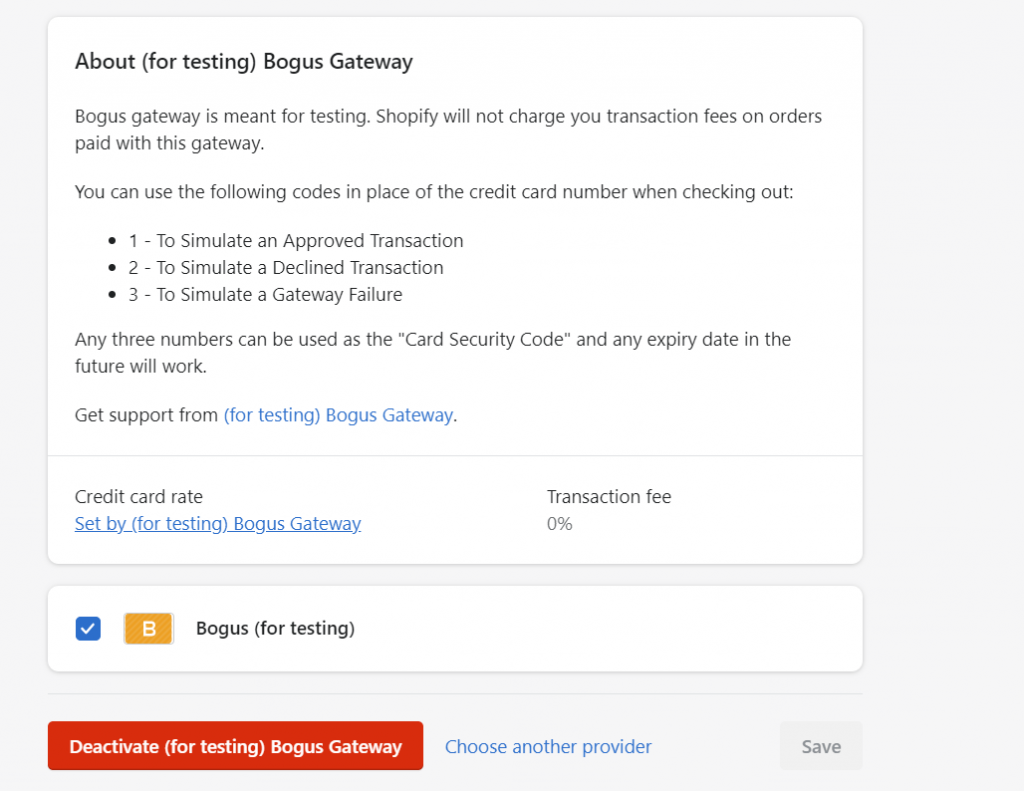
You can also deactivate the same anytime, through the same options.
Test Shopify Payments
Once you’ve enabled the Shopify payments test mode, it’s time for some testing
Remember, you can not use real credit card details in the test mode…! You can use the details provided by Shopify to simulate successful and failed transactions!
Just follow the upcoming steps to test Shopify payments.
Stimulate a Successful Transaction
Now comes the fun part – simulating a successful transaction. Head to your online store’s landing page, add an item to your cart and proceed to checkout. Fill out all the required details as if you were a customer. When you get to the payment section, use one of the Shopify test credit card numbers. Follow the prompts, and voila! You’ll receive a confirmation page and email.
Shopify Test Credit Card Information
Shopify provides test credit card numbers for each major credit card provider. These allow you to test payments on Shopify, without the need to spend any actual money.
The test credit card numbers are as follows:
- Visa – 4242424242424242
- Mastercard – 5555555555554444
- American Express – 378282246310005
- Discover – 6011111111111117
- Diners Club – 30569309025904
- JCB – 3530111333300000
To simulate a successful transaction, use the following additional information when you are asked for credit card details at checkout:
- Name on card: Enter at least two words.
- Expiry date: Enter any date in the future.
- Security code: Enter any three digits.
Review Your Test Order
Back in your Shopify Admin, click on Orders. You’ll see your test order with a banner confirming it’s a test. Remember, don’t fulfill or print any shipping labels for test orders. You can archive or cancel test orders from here.
Stimulate a Failed Transaction
Time to test the other side – a failed transaction. Repeat the process of adding an item, filling out details, and reaching the payment page. Shopify also provides bogus credit card numbers to allow you to test failed transactions. The numbers are:
- Use credit card number 4000000000000002 to generate a card declined message.
- Use credit card number 4242424242424241 to generate an incorrect number message.
- Use credit card number 4000000000000259 to simulate a disputed transaction.
- Use an invalid expiry month, for example, 13, to generate an invalid expiry month message.
- Use an expiry year in the past to generate an invalid expiry year message.
- Use a two-digit security code number to generate an invalid security code message.
Disable Shopify Payments Test Mode
Once you’ve finished testing, head back to Settings in your Shopify Admin, click on Payments, and then Manage in the Shopify Payments section. Scroll down to Test Mode, uncheck Enable test mode, and if you disabled accelerated checkouts, you can re-enable them now. Click Save to finish up.
And there you have it! You’ve successfully tested Shopify Payments on your online store. It’s all about ensuring a seamless checkout experience for your customers. Happy selling!
