Bigcommerce is a popular e-commerce platform that allows businesses to create online stores and sell products. One of the key features of Bigcommerce is the ability to add custom widgets to your store.
Widgets are small applications that can enhance the functionality of your store and improve the user experience. In this blog post, we’ll explore how to create a Bigcommerce widget step-by-step.
Read Also: How Feedonomics Can Help Grow Your BigCommerce Store
Step 1: Define the Widget
The first step in creating a Bigcommerce widget is to define its purpose and functionality. Consider what problem the widget is solving, what information it displays or collects, and what features it needs. For example, you might create a widget that displays a recommended product list based on the customer’s browsing history.
Step 2: Set up a Development Environment
To create a Bigcommerce widget, you’ll need a development environment where you can write and test code. You can use any code editor such as Visual Studio Code, Sublime Text, or Atom. You’ll also need a Bigcommerce store to test the widget on.
Step 3: Create the Widget Files
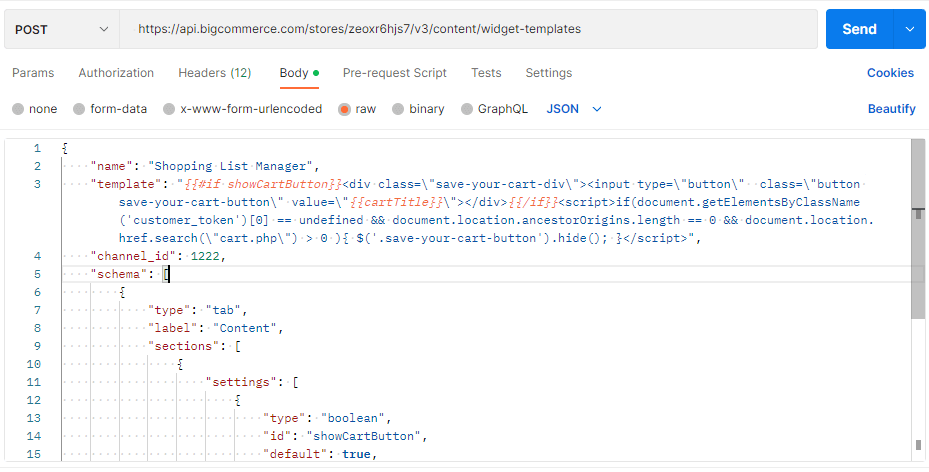
Once you have set up the development environment, create the necessary files for the widget. You will need an HTML file, a CSS file, and a JavaScript file. In addition, you will need to create a JSON file that describes the widget.
The HTML file will contain the markup for the widget. You can use any HTML element to structure the widget. The CSS file will contain the styles for the widget, while the JavaScript file will contain the functionality for the widget.
The JSON file will contain the metadata for the widget, such as the widget name, description, and version number. It will also contain information about the widget’s dependencies and settings.
Read Also: Catalyst by BigCommerce: Streamlining Ecommerce Composability
Step 4: Connect to the BigCommerce API
To create a Bigcommerce widget, you’ll need to connect to the Bigcommerce API. The API allows you to access data from your store and perform various actions. You can use the API to retrieve product information, customer data, and order details.
To connect to the API, you’ll need to obtain an API key and API secret from your Bigcommerce store. You can do this by creating a new API account in the Bigcommerce control panel. Once you have the API key and secret, you can use them to authenticate API requests.
Step 5: Code the Widget Functionality
With the API connected, you can now code the functionality for the widget. You can use JavaScript to retrieve data from the API and display it in the widget. For example, you might retrieve the top-selling products in the store and display them in the widget.
You can also use JavaScript to add interactivity to the widget. For example, you might create a dropdown menu that allows customers to filter products by category or price range.
Step 6: Upload the Widget Files to Bigcommerce
Once you have coded the widget functionality, you can upload the widget files to your Bigcommerce store. To do this, you’ll need to create a ZIP file that contains all the necessary files and folders. You can then upload the ZIP file to the Bigcommerce control panel.
Step 7: Install the Widget in Bigcommerce
With the widget files uploaded, you can now install the widget in your Bigcommerce store. To do this, go to the Apps section in the Bigcommerce control panel and click on the “My Apps” tab. From there, click on the “Install” button next to the widget you want to install.
Step 8: Test and Launch the Widget
With the widget installed, you can now test it in your Bigcommerce store. Make sure it works as expected and doesn’t cause any issues or errors. Once you’re satisfied with the widget, you can use the widget in your theme.
In the End:
BigCommerce offers a flexible platform for creating and managing online stores, including the option to add custom widgets. These widgets are small applications that enhance store functionality and improve the user experience.
This article walks you through the process of making a BigCommerce widget step-by-step.
First, define what you want your widget to do and what features it should have. Next, set up a development environment where you’ll use HTML, CSS, and JavaScript to build the widget’s design and functions.
Connecting your widget to the BigCommerce API is crucial. This allows the widget to use store data to function properly.
Once your widget is built, you need to integrate it into your BigCommerce store. This involves packaging and uploading the widget files and then installing them through the store’s control panel. After that, you should test the widget to make sure it works correctly and meets your store’s needs before launching it.
Read Also: BigCommerce Multi-Storefront: Everything You Need to Know!
This guide aims to help businesses make the most of BigCommerce by creating custom widgets. Enhancing user experience and functionality with these widgets can give your store a competitive edge and create a better shopping environment for your customers.


