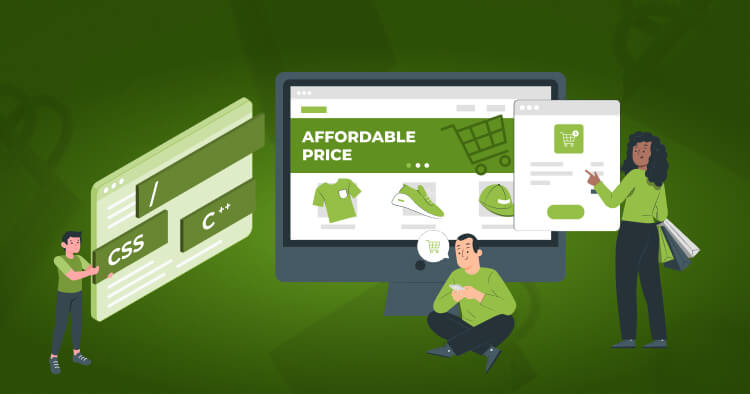
Expanding your online reach requires innovative integration solutions.
If you’re looking to embed Shopify into website pages without rebuilding your entire site, you’re making a strategic move that thousands of successful merchants have already taken.
This comprehensive guide walks you through every step of Shopify website integration, from initial setup to advanced customization techniques.
Whether you run a WordPress blog, a custom HTML site, or an established business platform, learning how to add Shopify to your website opens new revenue streams while maintaining your existing brand identity.
The process is straightforward, and with Shopify’s Buy Button feature, you can integrate Shopify into your website infrastructure within minutes.
Summary
This guide covers everything you need to successfully embed Shopify store in website platforms:
- Understanding Integration Benefits: Learn why thousands of businesses choose to add Shopify to website rather than building separate stores, including cost savings and seamless customer experiences.
- Buy Button Setup Process: Step-by-step instructions for creating, customizing, and implementing Shopify’s powerful Buy Button across different platforms.
- Platform-Specific Implementation: Detailed guidance for WordPress, Wix, Squarespace, and custom HTML websites with exact code placement instructions.
- Customization Options: Advanced styling techniques to match your brand aesthetics, from button colors to checkout flows.
- Technical Troubleshooting: Common issues and solutions when integrating Shopify with various content management systems.
- Performance Optimization: Best practices to ensure your embedded Shopify functionality loads quickly and converts effectively.
Why Integrate Shopify Into Your Existing Website?
Before diving into the technical steps, understanding the strategic advantages helps justify this integration approach for your business model.
Leverage Existing Website Traffic
Your current website already attracts visitors through SEO efforts, content marketing, and brand recognition.
When you can you add shopify to an existing website, you monetize this established traffic without redirecting users to unfamiliar platforms.
Studies show that keeping customers on familiar domains increases conversion rates by up to 35% compared to external shopping carts.
Maintain Brand Consistency
Redirecting customers to separate Shopify stores often creates visual disconnects that damage trust and increase cart abandonment.
Embedding Shopify preserves your website’s design language, colors, fonts, and user experience.
This seamless integration reinforces brand identity while delivering Shopify’s robust ecommerce functionality behind the scenes.
Cost-Effective Ecommerce Solution
Building custom ecommerce functionality from scratch requires significant development investment and ongoing maintenance costs.
The ability to integrate Shopify into website infrastructure provides enterprise-level features at a fraction of the cost.
Shopify Lite plans start at just $9/month, offering tremendous value for businesses testing product sales or maintaining simple storefronts.
Simplified Inventory Management
Shopify handles complex backend operations, including inventory tracking, order processing, payment security, and shipping logistics.
You focus on marketing and customer service while Shopify manages the technical infrastructure.
This division of responsibilities proves especially valuable for small teams and solo entrepreneurs.
Now that we’ve covered the compelling reasons to embed Shopify into your website, let’s explore the primary integration tool.
Understanding Shopify Buy Button: Your Integration Tool
The Shopify Buy Button serves as your primary tool when learning how to add Shopify to website pages effectively.
What Is the Buy Button?
The Buy Button is Shopify’s free sales channel that generates embeddable code for individual products or collections.
It creates three essential purchase pathways:
- Direct Checkout: Customers click your button and land immediately on Shopify’s secure checkout page to complete purchases.
- Add to Cart: Products add to a shopping cart widget that appears on your site, allowing customers to continue browsing before checkout.
- Product Details Modal: Clicking the button opens a popup displaying full product information, images, variants, and purchase options.
Key Features and Capabilities
Understanding the Buy Button’s full feature set helps you maximize its potential for your integration strategy.
The tool supports product variants (sizes, colors, styles), quantity selectors, custom text fields, and inventory tracking.
You can embed single products, entire collections, or curated product groupings depending on your merchandising strategy.
The Buy Button also includes abandoned cart recovery, discount codes, gift cards, and multi-currency support.
Let’s move into the practical implementation steps you’ll need to follow.
Step 1: Adding the Buy Button Sales Channel
Every integration journey begins with activating the Buy Button feature in your Shopify account.
Creating Your Shopify Account
If you don’t already have a Shopify account, visit Shopify.com and start your free trial.
You’ll need to provide basic business information, including your store name, business address, and industry.
For integration purposes, you can use Shopify Lite ($9/month) or any standard Shopify plan that includes the Buy Button feature.
Activating the Buy Button Channel
Once logged into your Shopify admin dashboard, navigate to the Sales Channels section in the left sidebar.
Click “+” next to Sales Channels and select “Buy Button” from the available options.
The system will install the Buy Button channel and add it to your sales channels list.
For mobile users, open your Shopify app, tap the Store button, select Sales Channels, and add the Buy Button channel.
This activation process takes less than 60 seconds and immediately unlocks the ability to create embeddable product buttons.
With your Buy Button channel activated, you’re ready to create your first embeddable product button.
Step 2: Creating Your First Buy Button
Creating compelling buy buttons requires both technical setup and strategic product selection.
Selecting Products for Integration
Navigate to your Buy Button sales channel and click “Create a Buy Button.”
You’ll face a critical decision: embed a single product or create a collection landing page.
- Single Product Buttons: Perfect for featured products, limited-time offers, or blog post monetization where you’re discussing specific items.
- Collection Buttons: Ideal for category pages, themed product groups, or creating mini-stores within content hubs on your website.
Choose based on your integration goals and the customer journey you’re designing.
Let’s explore the extensive customization options that make your embedded buttons match your brand perfectly.
Step 3: Customizing Your Buy Button Appearance
Customization transforms generic Shopify buttons into seamless extensions of your brand identity and website design.
Button Style Options
The Buy Button editor provides comprehensive styling controls in the Button Style section.
Adjust colors for button backgrounds, text, borders, and hover states to match your brand palette.
Choose fonts from Shopify’s library or input custom font families to maintain typographic consistency with your website.
Modify corner radius for sharp edges, rounded corners, or fully circular buttons depending on your design language.
Layout Configurations
Shopify offers three primary layout templates, each serving different use cases:
- Classic Layout: Displays product image, title, price, and purchase button in a vertical stack – ideal for sidebar integrations.
- Basic Layout: Minimal design showing only essential purchase information – works well embedded within text content.
- Complete Layout: Comprehensive product showcase including multiple images, full description, and prominent purchase options – suitable for dedicated product pages.
Action Triggers
Define what happens when customers click your embedded button:
- Add to Cart: Products add to a cart widget, allowing continued shopping – best for multi-product scenarios.
- Checkout: Redirects immediately to secure checkout – optimal for single-item impulse purchases.
- View Product Details: Opens a modal popup with comprehensive product information – suitable when embedding in content where customers need more details.
Your choice should align with the customer journey and purchase intent at the button’s location.
With your button customized to perfection, you’re ready to generate the embed code.
Step 4: Generating and Copying Embed Code
After customization, Shopify generates the HTML code needed to embed Shopify into website pages.
Understanding the Generated Code
Click “Next” or “Generate Code” after finalizing your button design.
Shopify produces two code components: a JavaScript library file and a specific product embed snippet.
The JavaScript file (loaded once per page) provides the Buy Button functionality.
The product snippet creates the actual button for your selected product or collection.
Code Copying Best Practices
Click the “Copy code” button to capture the complete embed code to your clipboard.
Avoid manually selecting and copying, as you might miss crucial characters or introduce formatting errors.
Code Placement Strategies
The embed code can be placed anywhere HTML is accepted on your website.
Common strategic locations include within content, sidebar widgets, dedicated shop pages, landing pages, and footer sections.
Choose placement based on user intent and content flow rather than arbitrary insertion.
Now let’s explore platform-specific implementation for popular website builders.
Platform-Specific Implementation Guide
Different content management systems require slightly different approaches when you add Shopify to website infrastructure.
WordPress Integration
WordPress represents the most common platform for Shopify website integration given its massive user base.
Block Editor (Gutenberg) Method:
- Edit the page or post where you want the button.
- Add a new block and search for “Custom HTML.”
- Paste your Buy Button embed code into the HTML block.
- Preview your page to ensure proper rendering.
Widget Areas:
- Navigate to Appearance > Widgets in WordPress admin.
- Add a “Custom HTML” widget to your desired sidebar or footer area.
- Paste your Buy Button code and save.
Wix Website Integration
Wix’s visual editor makes button placement intuitive through its embed element.
- Edit your Wix page in the editor.
- Click the “+” to add elements.
- Select “Embed” from the menu, then choose “Embed a Widget.”
- Paste your Shopify Buy Button code into the code box.
- Click outside the code box to see your button render.
Squarespace Integration
Squarespace supports embed blocks across most template families for seamless integration.
- Edit the page where you want your button.
- Click an insertion point and select “Code” from the block menu.
- Choose “HTML” as your code type.
- Paste your complete Buy Button embed code.
- Click “Apply” to render the button preview.
Custom HTML Websites
Static HTML sites offer the most direct integration approach without platform limitations.
- Open your HTML file in your preferred code editor.
- Locate the exact position where you want the button.
- Paste the Buy Button embed code at that location.
- Save your HTML file and upload it to your web hosting server.
With implementation complete across various platforms, let’s address the crucial testing phase.
Testing Your Embedded Shopify Store
Thorough testing prevents customer frustration and ensures proper revenue tracking through your integration.
Functionality Testing Checklist
Before announcing your new shopping capabilities, methodically test every component:
- Button Display: Verify buttons appear correctly across all pages where embedded, with proper styling and no layout breaks.
- Product Information: Confirm product titles, images, prices, and descriptions display accurately.
- Add to Cart: Test adding products to the cart, adjusting quantities, and viewing cart contents.
- Checkout Flow: Complete test purchases through the entire checkout process, including payment processing.
- Mobile Responsiveness: Open pages on phones and tablets to verify proper responsive behavior.
Test Purchase Protocol
Conducting actual test transactions reveals issues that visual inspection might miss. Use Shopify’s test credit card numbers to process test orders.
Complete the entire purchase flow, including payment information entry. Verify order confirmation emails are sent correctly.
Check that orders appear in your Shopify admin panel with accurate details.
With testing complete, let’s explore advanced customization options beyond basic button embedding.
Beyond Buy Buttons: Advanced Integration Options
While Buy Buttons solve most integration needs, advanced scenarios may require additional approaches to embed Shopify store in website pages more comprehensively.
Embedded Product Pages
Rather than simple buttons, you can embed entire product pages that maintain your website’s wrapper navigation and branding.
This approach uses iframe technology to display full Shopify product pages within your website’s design framework.
Create a dedicated “Shop” section on your website with custom navigation while the product content itself loads from Shopify.
Collection Displays
Embedding entire product collections creates mini-storefronts within content sections of your main website.
Use Shopify’s collection embed option when creating Buy Buttons to generate code for entire product groupings.
These embedded collections display multiple products with images, prices, and quick add-to-cart functionality.
They’re particularly effective for category pages, seasonal promotions, or curated product recommendations.
Let’s address common challenges you might encounter during the integration process.
Troubleshooting Common Integration Issues
Even straightforward integrations occasionally present technical challenges requiring specific solutions.
Button Not Displaying
If your button fails to appear after embedding the code:
- Clear Browser Cache: Hard refresh your browser (Ctrl+F5 or Cmd+Shift+R) to force loading of new code.
- Verify Code Placement: Ensure you’ve pasted the complete embed code, including both JavaScript and product elements.
- Check Platform Restrictions: Some website builders strip JavaScript for security – verify your platform supports embedded scripts.
Styling Inconsistencies
When your embedded button’s appearance doesn’t match expectations:
- CSS Conflicts: Your website’s existing CSS might override Buy Button styles – use browser inspector tools to identify conflicting rules.
- Responsive Breakpoints: Test buttons at various screen sizes as responsive styles might behave unexpectedly.
Checkout Issues
Problems during the purchase process require immediate attention:
- Payment Gateway Configuration: Verify your Shopify Payments or third-party gateway is configured correctly and active.
- Domain Settings: Ensure your Shopify checkout domain is correctly configured to avoid security warnings.
- SSL Certificate: Your website must use HTTPS to securely communicate with Shopify’s checkout.
Now let’s discuss strategies for maximizing sales through your embedded Shopify integration.
Maximizing Sales Through Strategic Placement
Successful integration extends beyond technical implementation to strategic product positioning and conversion optimization.
Content-Commerce Integration
The most effective embedded products feel naturally integrated within valuable content rather than appearing as intrusive advertisements.
- Product Mentions in Blog Posts: When discussing topics naturally related to products you sell, embed relevant Buy Buttons within your article content. For example, a blog post about “Best Running Shoes for Winter” should feature embedded buy buttons for the specific shoes you’re reviewing.
- Tutorial Integration: How-to guides and tutorials can seamlessly integrate the products required to complete the projects or tasks you’re teaching.
- Comparison Content: Product comparison articles benefit enormously from embedded buttons allowing immediate purchases of recommended items.
Landing Page Optimization
Dedicated landing pages showcasing embedded products require specific optimization techniques:
- Clear Value Proposition: Immediately communicate the benefit of your product above the fold.
- Social Proof: Include reviews, testimonials, and user-generated content near embedded buy buttons to build trust.
- Single Call-to-Action: Avoid competing CTAs – your embedded buy button should be the primary action on product landing pages.
- Mobile-First Design: Over 60% of ecommerce traffic comes from mobile devices – optimize your embedded product pages accordingly.
Social Media Commerce
Extend your integration beyond your website to social media profiles:
- Facebook Shop Integration: Shopify natively integrates with Facebook Shops, extending your embedded approach to social platforms.
- Instagram Shopping: Tag products in Instagram posts with shopping links that drive traffic to your embedded product pages.
- Link in Bio Solutions: Services like Linktree can feature links to multiple embedded product pages on your website.
This omnichannel approach ensures customers can purchase through their preferred platforms while maintaining your website as the central commerce hub.
Maintaining Your Shopify Integration
Successful long-term integration requires ongoing attention to performance, security, and optimization opportunities.
Regular Testing Schedule
Establish a monthly testing routine, checking functionality, pricing accuracy, inventory synchronization, and mobile experience.
This proactive approach identifies issues before they impact customer experience and sales.
Analytics Review
Monthly analytics reviews reveal optimization opportunities and potential problems:
- Conversion Rate Analysis: Compare conversion rates between embedded products and traditional store pages.
- Cart Abandonment Tracking: Monitor where customers drop off in the purchase process.
- Product Performance: Identify which embedded products drive the most sales versus underperforming items.
Update Management
Shopify periodically updates the Buy Button features and API versions. Subscribe to Shopify’s developer changelog to stay informed about updates.
After any Shopify updates, re-test your embedded buttons to catch compatibility issues.
Key Takeaways
- Strategic Integration: Embedding Shopify into existing websites maintains brand consistency while monetizing established traffic without complex development.
- Buy Button Versatility: Shopify’s Buy Button sales channel enables flexible integration across virtually any website platform through simple HTML embedding.
- Customization Control: Extensive styling options ensure embedded shopping experiences perfectly match your brand aesthetics and user experience expectations.
- Platform Compatibility: Successfully integrate Shopify with WordPress, Wix, Squarespace, and custom HTML sites using platform-specific implementation methods.
- Testing Imperative: Thorough functionality testing, cross-browser compatibility checks, and mobile responsiveness verification prevent customer experience issues.
Conclusion
Learning to embed Shopify into website infrastructure opens powerful ecommerce capabilities without abandoning your existing digital presence.
The Buy Button sales channel, combined with strategic placement and ongoing optimization, transforms any website into a revenue-generating platform.
Whether you’re a blogger monetizing content, a business expanding sales channels, or an entrepreneur testing product viability, Shopify website integration provides the flexibility and power you need to succeed online.
Start with a single product embedding to learn the process, then scale your integration as you discover what resonates with your audience.
The ability to add Shopify to website pages without technical expertise democratizes ecommerce, making professional online selling accessible to everyone.


