Are you ready to take your e-commerce business to the next level? Look no further than WooCommerce Salesforce Integration! In this blog post, we will explore how combining these two powerful platforms can streamline your sales process, boost customer engagement, and supercharge your online store. Get ready to transform your business with seamless integration – let’s dive in!
Introduction to WooCommerce and Salesforce:
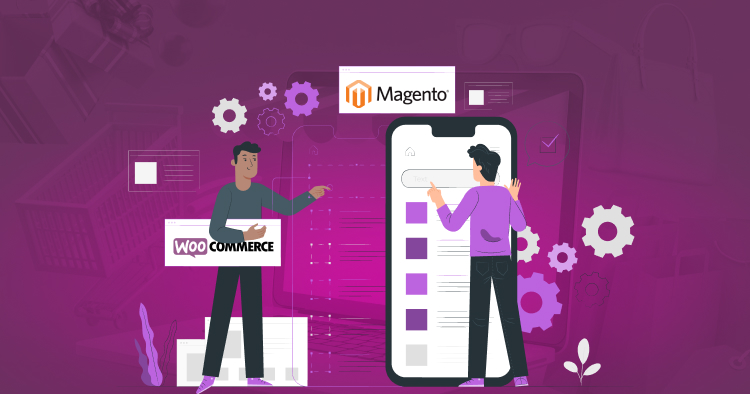
WooCommerce and Salesforce are two powerful platforms that can greatly benefit businesses of all sizes. Both platforms offer unique features and functionalities that allow businesses to manage their operations efficiently and effectively.
WooCommerce is an open-source e-commerce platform designed for WordPress websites. It is a popular choice among small and medium-sized businesses due to its user-friendly interface, flexibility, and affordability. With WooCommerce B2B Solution businesses can easily set up an online store, manage products, process payments, and track orders.
On the other hand, Salesforce is a cloud-based customer relationship management (CRM) software used by companies of all sizes. It offers a comprehensive set of tools for managing sales, marketing, customer service, and more. With Salesforce, businesses can streamline their processes, improve communication with customers, and make data-driven decisions.
Integrating WooCommerce with Salesforce brings together the best of both worlds – e-commerce capabilities from WooCommerce and CRM functionalities from Salesforce. This integration allows businesses to enhance their overall efficiency by automating tasks between these two platforms.
Benefits WooCommerce Integration with Salesforce:
-
Streamlined Data Management:
One of the main benefits of integrating these two platforms is streamlined data management. With the integration in place, data such as customer information, sales orders, product details can be automatically synced between WooCommerce and Salesforce. This eliminates manual data entry tasks while ensuring accurate data across both platforms.
-
Improved Customer Insights:
By combining e-commerce data from WooCommerce with customer information from Salesforce CRM, businesses gain a holistic view of their customers’ behavior across all touchpoints. This enables them to personalize marketing efforts based on customer preferences and purchase history.
-
Automated Order Processing:
Integrating WooCommerce with Salesforce automates order processing by syncing sales orders in real-time between both platforms. This ensures that inventory levels are updated accurately on both systems while reducing the risk of overselling or stockouts.
-
Efficient Sales Management:
With the integration in place, businesses can easily track and manage sales from WooCommerce within Salesforce. This allows for a more efficient sales process, as sales teams can access order history, customer information, and other relevant data from one central location.
Read More: Set Up Klaviyo WooCommerce Integration
Step-by-Step Guide on How to Integrate WooCommerce and Salesforce:
Integrating WooCommerce, a popular eCommerce platform, with Salesforce, the leading customer relationship management (CRM) software, can bring countless benefits to your business. It allows you to streamline your sales process, improve customer experience, and increase overall efficiency. In this step-by-step guide, we will walk you through the process of WooCommerce development and integrating these two powerful systems.
Step 1: Understand the Benefits of Integration
Before getting started, it’s important to understand the benefits of WooCommerce Integration with Salesforce. By connecting these two platforms, you can have seamless data synchronization between them. This means that any changes or updates made in one system will automatically reflect in the other. This eliminates manual data entry and ensures accurate information at all times.
Step 2: Choose an Integration Method
There are several ways for WooCommerce Integration with Salesforce depending on your business needs and technical expertise. The most common methods include using a plugin like Zapier or using a custom code integration through API (application programming interface). If you’re not familiar with coding, using a plugin is recommended as it offers a user-friendly interface for integration.
Step 3: Install the Plugin/Configure API
If you’ve chosen to use a plugin like Zapier, install it on both your WooCommerce store and Salesforce account. Then follow the prompts to connect the two platforms by authorizing access from both sides. If you’re going for an API integration, consult with a developer for assistance in configuring it correctly.
Step 4: Map Data Fields
Once the connection is established between WooCommerce and Salesforce through either method, you’ll need to map data fields between the two systems. Mapping involves identifying which data should be synced between them such as product details, customer information or order status.
Step 5: Test Your Integration
After mapping data fields accurately, test your integration by creating sample orders on your website. These orders should automatically appear in your Salesforce account. If everything is working smoothly, you’re all set to go!
Step 6: Monitor and Troubleshoot
It’s important to monitor your integration regularly to ensure that data is syncing correctly. In case of any issues, consult with your plugin provider or developer for troubleshooting steps.
Congratulations! You have successfully integrated WooCommerce and Salesforce, creating a powerful system that will help take your business to new heights. With seamless data synchronization and improved efficiency, you can focus on growing your business and providing an exceptional experience for your customers.
Setting up a Salesforce Developer Account
To begin integrating WooCommerce with Salesforce, the first step is to set up a Salesforce Developer Account. This will allow developers to access the tools and resources needed for creating custom integrations between the two platforms.
Setting up a Salesforce Developer Account is free and can be done in just a few simple steps. First, go to the Salesforce Developer website and click on the “Sign Up” button. You will then be prompted to enter your personal information such as name, email address, and company name.
Next, you will need to verify your email address by clicking on the confirmation link sent to your inbox. Once verified, you will be redirected back to the website where you can create an account password.
After creating your account password, you will then have access to the Salesforce Developer Console. This is where all of the development work takes place. It allows developers to build and test custom integrations before deploying them into their live environment.
The next step is to create a new connected app in your developer console. A connected app acts as a bridge between WooCommerce and Salesforce by providing an API (Application Programming Interface) connection that enables communication between the two platforms.
To create a connected app, go to “Setup” in your developer console and search for “App Manager.” Click on “New Connected App” and fill out all of the required fields such as app name, API name, contact email, etc. Make sure to select “Enable OAuth Settings” and provide a callback URL for authentication purposes.
Once your connected app has been created, you will need to generate a consumer key and secret key which will be used for authentication when setting up the integration with WooCommerce.
The final step in setting up your Salesforce Developer Account is configuring permissions for your connected app. Go back to Setup > App Manager > [Your Connected App] > Edit Policies > Manage Profiles. Here you can assign permission sets or profiles that have access to this connected app.
Congratulations, you have successfully set up your Salesforce Developer Account! Now you can move on to the next steps of integrating WooCommerce with Salesforce. With a developer account, you have access to various resources and tools that will make the integration process smoother and easier.
Read More: WooCommerce NetSuite Integration
Installing the WooCommerce Salesforce Integration Plugin
Installing the WooCommerce Salesforce Integration Plugin is a crucial step in setting up the integration between your online store and your Salesforce CRM. This plugin serves as the bridge that connects the two platforms, allowing for seamless data transfer and synchronization.
To begin with, you need to have both WooCommerce and Salesforce accounts set up before installing the integration plugin. Once you have these prerequisites in place, follow these simple steps to install the plugin:
Step 1: Go to WordPress Dashboard
Log into your WordPress dashboard and click on “Plugins” from the left-hand menu.
Step 2: Add New Plugin
Click on “Add New” button at the top of the page. This will take you to a new screen where you can search for plugins.
Step 3: Search for WooCommerce Salesforce Integration
In the search bar, type in “WooCommerce Salesforce Integration” and hit enter. The first result should be our official integration plugin by Webkul.
Step 4: Install and Activate
Click on “Install Now” next to our plugin’s name. Once it is installed, click on “Activate.”
Step 5: Configure Settings
After activation, go to WooCommerce > Settings > Integration tab. Here, you will see a new option added for Salesforce Integration. Click on it to configure your settings.
Step 6: Connect Your Accounts
You will now need to connect your WooCommerce store with your Salesforce account. To do this, click on “Connect with Salesforce.” This will take you through an authorization process where you will log into your Salesforce account and grant permission for our integration plugin to access it.
Step 7: Map Fields
Once connected, go back to the settings page and map fields between WooCommerce products/customers/orders and corresponding objects/fields in your Salesforce account. This step is important as it determines what data gets transferred between both platforms.
Step 8: Save Changes
Make sure to save all changes before exiting the settings page.
Congratulations, you have successfully installed the WooCommerce Salesforce Integration Plugin and completed the initial setup. From now on, any new orders, customers or products in your store will automatically be synced with your Salesforce CRM, saving you time and effort.
Installing the WooCommerce Salesforce Integration Plugin is a straightforward process that only takes a few minutes. Once installed, this plugin helps streamline your business operations by keeping your online store and CRM data up-to-date and synchronized.
Read More: WooCommerce NetSuite Integration
Configuring the Integration Settings
Configuring the Integration Settings is a crucial step in setting up the WooCommerce Salesforce integration. This section will guide you through the different settings and options available, ensuring a seamless integration between your e-commerce store and Salesforce.
1- Setting up API Credentials: The first step in configuring the integration settings is to set up your API credentials. This involves generating an API key and secret in your Salesforce account and entering them into the corresponding fields in your WooCommerce settings. This step enables secure communication between your two platforms.
2- Mapping Fields: Field mapping allows you to define how data from WooCommerce will be synced with Salesforce. In this step, you can map fields such as product name, price, quantity, customer information, etc., from WooCommerce to their respective fields in Salesforce. It ensures that all relevant data is accurately transferred between the two platforms.
3- Sync Settings: You can also configure how frequently you want data to be synced between WooCommerce and Salesforce by adjusting the sync settings. You have the option to sync data manually or automatically at regular intervals. Additionally, you can choose which types of data should be synced, including orders, products, customers, etc.
4- De-duplication Rules: Duplicate records can cause confusion and clutter in your CRM system; hence it is essential to set up de-duplication rules while configuring the integration settings. These rules prevent duplicate records from being created when syncing data from WooCommerce to Salesforce.
5- Email Notification Settings: Under this section, you can specify email addresses that should receive notifications regarding any issues or errors during data syncing between WooCommerce and Salesforce. It helps keep track of any problems that may occur during synchronization so they can be resolved promptly.
6- Custom Object Mapping: If you have custom objects set up in either platform, it’s important to map them correctly for proper integration functioning smoothly between them.
7- Test Connection: Before finalizing the configuration process, we highly recommend testing the connection between WooCommerce and Salesforce. This step ensures that all settings are correctly configured and that data can be successfully synced between the two platforms.
Conclusion:
By following these steps to configure your integration settings, you can ensure a smooth and efficient integration process between WooCommerce and Salesforce, allowing for seamless data transfer and improved business operations.